Blog

Using Claude Code to modernize a 25-year-old kernel driver

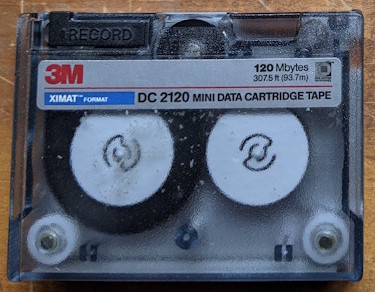
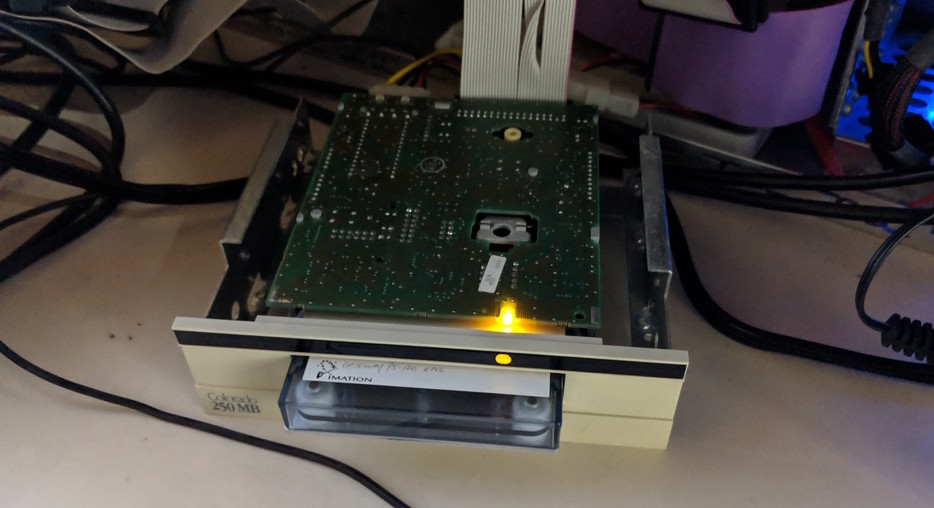
As a bit of background, one of my hobbies is helping people recover data from old tape cartridges, such as QIC-80 tapes, which were a rather popular backup medium in the 1990s among individuals, small businesses, BBS operators, and the like. I have a soft spot for tape media; there’s something about the tactile sensation of holding these tapes in my hands that makes the whole process very joyful, even though QIC tapes are notorious for their many design flaws. With some careful inspection and reconditioning, the data on these tapes is still totally recoverable, even after all these years.

Whenever I receive a QIC-80 tape for recovery, I power up one of my older PC workstations which has the appropriate tape drive attached to it, and boot into a very old version of Linux (namely CentOS 3.5), because this is the only way to use the ftape driver, which is the kernel driver necessary for communicating with this tape drive, allowing the user to dump the binary contents of the tape.

You see, the drive that reads these tapes connects to the floppy controller on the motherboard. This clever hack was done as a cost-saving measure: instead of having to purchase a separate SCSI adapter (the standard interface for higher-tier tape media), you can just connect this tape drive to your floppy controller, which was already available on most PCs. It can even work alongside your existing floppy drive, on the same ribbon cable! The tradeoff, of course, is that the data rate is limited by the speed of the floppy controller, which was something like 500 Kbps (that’s kilobits, not bytes).

The other downside is that the protocol for communicating with these tape drives through the floppy controller was very messy, nonstandard, and not very well-supported. It was a “hack” in every sense: your motherboard’s BIOS had no knowledge of the tape drive being connected, and it was entirely up to the end-user software to know exactly how to manipulate the hardware I/O ports, timings, interrupts, etc. to trick the floppy controller into sending the appropriate commands to the tape drive.

image

There were a small number of proprietary tools for MS-DOS and Windows 3.x/9x for dealing with these drives, and only one open-source implementation for Linux, namely ftape. Of course it is possible to use those original DOS/Windows tools to read the tapes, but it’s actually only ftape that allows us to read the “raw” binary contents of the tape, regardless of which proprietary software originally wrote it, which is why I prefer it for dumping the contents and worrying afterwards about decoding the proprietary logical formatting, and then extracting the files from it.

The trouble is, the ftape driver hasn’t been supported since roughly the year 2000, and was soon removed from the Linux kernel for this reason. This is why I’ve needed to run a painfully old version of Linux anytime I have to work with one of these drives. It would be great if ftape worked on a modern distro, with all the benefits and affordances that would provide.

***

So a couple of weeks ago, it occurred to me to make a simple request to Claude Code:

> This repository is a Linux kernel driver that communicates with legacy tape drives connected to the floppy
  controller (FDC) on the motherboard. Unfortunately, this driver hasn't been maintained for a long time, and
  can only compile under kernel version 2.4. I'd like to modernize this driver, allowing it to be built with
  the latest versions of the kernel.

● I'll help you modernize this Linux kernel driver for legacy tape drives. This is a significant task that
  will require updating the code to work with modern kernel APIs and conventions.

And after several iterations of “combobulating” and whatever else Claude claims to do, I suddenly had a kernel driver that was compiling without errors. This is because Claude is able to take the compiler output and feed it back into itself, until the compilation works correctly. There was a laundry list of kernel functions and structures that were understandably deprecated or replaced, in the eternity that elapsed between kernel version 2.4 and version 6.8. Amazingly, Claude found all the outdated bits and replaced them with the correct modern equivalents, requiring just a few manual touch-ups of the code (a bit more on this later).

At this point, however, the kernel driver was still expected to be compiled as part of a full kernel tree, whereas I just wanted it to become a standalone loadable kernel module. OK, no problem:

> Is there a way to compile just this module in-place, instead of copying it into a kernel source tree?

● Yes! You can compile kernel modules out-of-tree without copying them into the kernel source. Let me create
  a proper standalone build system for the ftape driver.

…And it did. Without any further prompting. At the end of this stage, I had a loadable kernel module (.ko) that I could start trying to use with actual live hardware. Unsurprisingly, the module did not yet “work” — it was loading, but something was preventing it from communicating with the tape drive correctly. But I pressed on.

From this point forward, since loading/unloading kernel modules requires sudo, I could no longer let Claude “iterate” on such sensitive operations by itself. Luckily, the ftape driver was already generously sprinkled with logging messages (printk() calls that are printed to dmesg), so I loaded the module myself, and iteratively pasted the output of dmesg into Claude manually, and let Claude compare it to a “known-good” dmesg log that I’d previously saved from a successful tape read. After a few iterations of this, Claude identified the remaining issues preventing the module from communicating with the hardware.

● Perfect! The module has parameters that can be set. The issue is that without configuration, all the base
  addresses default to -1, which gets converted to 0xffff in the config function, causing the detection to fail.
● The "No such device or address" (ENXIO) error occurs because the ftape-internal module is not configured
  with the correct I/O port base address for your floppy controller.
  The issue is in fdc-internal.c:735-737: if fdc->sra == 0xffff, it returns -ENXIO. Since no configuration was
  provided, all values default to -1, which becomes 0xffff....

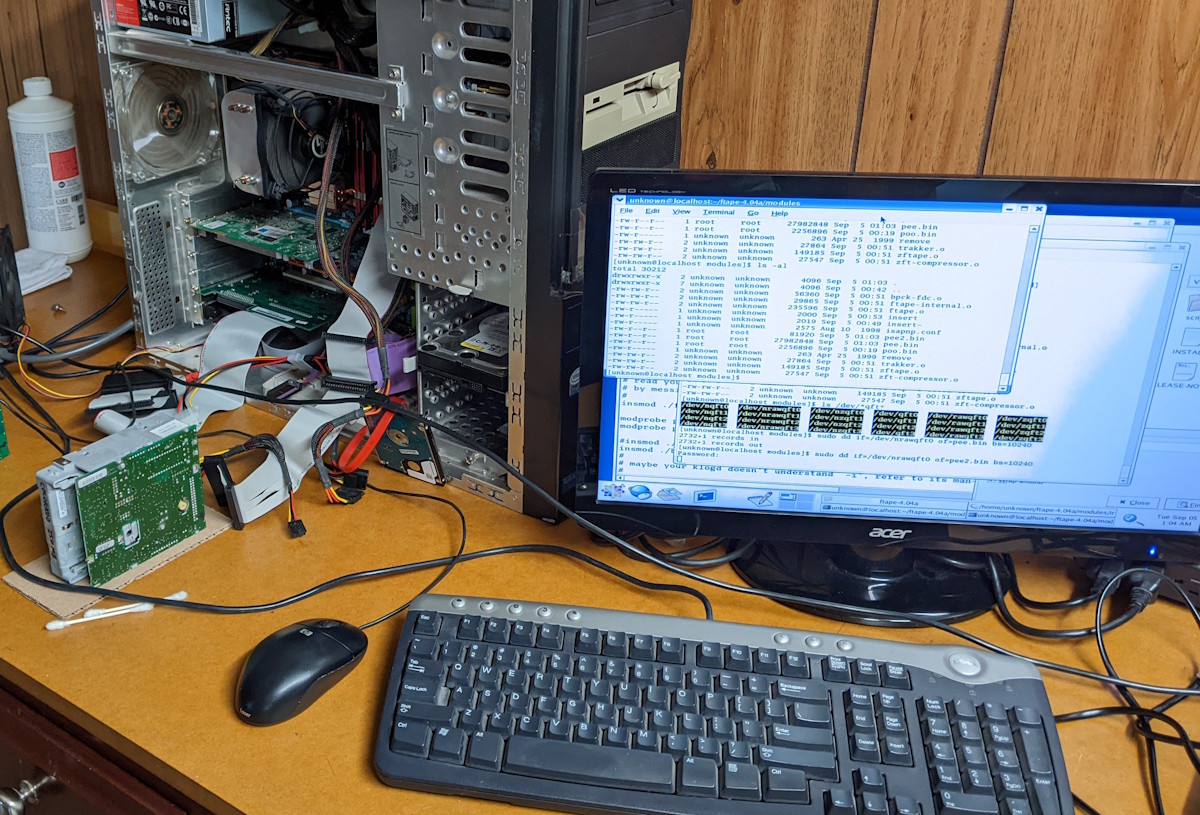
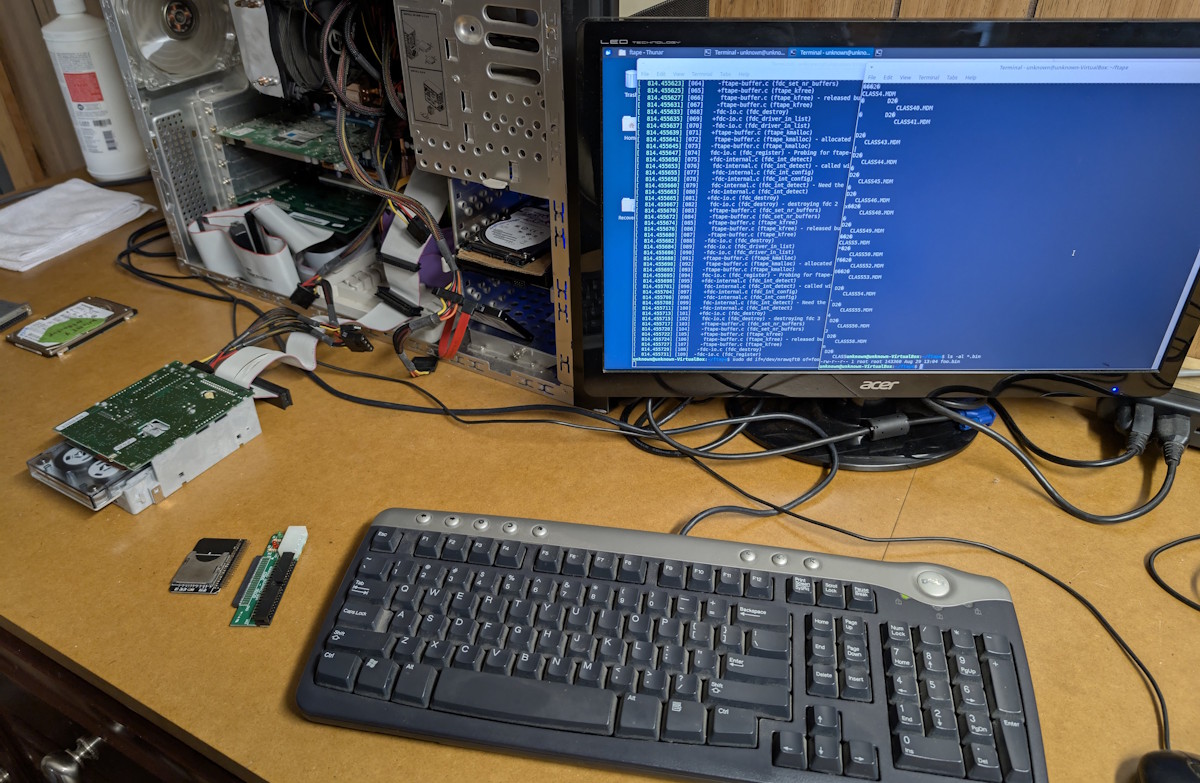
And at last, I had a kernel module that was able to a) load, b) detect the tape drive, and c) dump the contents of a test tape!

image

***

Using the ftape driver on a modern kernel, a feat that I thought was hopelessly out of reach, was suddenly completed over the course of two evenings.

As a giant caveat, I should note that I have a small bit of prior experience working with kernel modules, and a good amount of experience with C in general, so I don’t want to overstate Claude’s success in this scenario. As in, it wasn’t literally three prompts to get Claude to poop out a working kernel module, but rather several back-and-forth conversations and, yes, several manual fixups of the code. It would absolutely not be possible to perform this modernization without a baseline knowledge of the internals of a kernel module.

This led me to crystallize some thoughts on working with such coding agents in our current moment:

Open yourself up to a genuine collaboration with these tools.

Interacting with Claude Code felt like an actual collaboration with a fellow engineer. People like to compare it to working with a “junior” engineer, and I think that’s broadly accurate: it will do whatever you tell it to do, it’s eager to please, it’s overconfident, it’s quick to apologize and praise you for being “absolutely right” when you point out a mistake it made, and so on. Because of this, you (the human) are still the one who must provide the guardrails, make product decisions, enforce architectural guidelines, and spot potential problems as early as possible.

Be as specific as possible, making sure to use the domain-specific keywords for the task.

I’m not claiming to suddenly be an expert in prompt engineering, but the prompts that I’ve found to be most successful are ones that clearly lay out the verbal scaffolding for a feature, and then describe the gaps in the scaffolding that the LLM should fill in. (For some reason the image that comes to mind is one of those biological stem-cell scaffolds where an artificial human ear will grow.)

Develop an intuition for the kinds of tasks that are “well-suited” for an agent to complete.

These agents are not magical, and can’t do literally everything you ask. If you ask it to do something for which it’s not well-suited, you will become frustrated and prematurely reject these tools before you allow them to shine. On this point, it’s useful to learn how LLMs actually work, so that you develop a sense of their strengths and weaknesses.

Use these tools as a massive force multiplier of your own skills.

I’m sure that if I really wanted to, I could have done this modernization effort on my own. But that would have required me to learn kernel development as it was done 25 years ago. This would have probably taken me several weeks of nonstop poring over documentation that would be completely useless knowledge today. Instead of all that, I spent a couple of days chatting with an agent and having it explain to me all the things it did.

Naturally, I verified and tested the changes it made, and in the process I did end up learning a huge amount of things that will be actually useful to me in the future, such as modern kernel conventions, some interesting details of x86 architecture, as well as several command line incantations that I’ll be keeping in my arsenal.

Use these tools for rapid onboarding onto new frameworks.

I am not a kernel developer by any stretch, but this particular experience ignited a spark that might lead to more kernel-level work, and it turns out that kernel development isn’t nearly as difficult as it might sound. In another unrelated “vibe-coding” session, I built a Flutter app without having used Flutter before. If you’re like me, and your learning style is to learn by doing, these tools can radically accelerate your pace of learning new frameworks, freeing you up to do more high-level architectural thinking.

***

In any case, circling all the way back, I am now happy to say that ftape lives on! Twenty-five years after its last official release, it is once again buildable and usable on modern Linux. I’m still in the process of making some further tweaks and new feature additions, but I have already verified that it works with the floppy-based tape drives in my collection, as well as parallel-port-based drives which it also supports.

image

The physical setup looks very similar, but the OS is now Xubuntu 24.04, instead of CentOS 3.5! 🎉
Until next time!

DiskDigger + Avalonia UI: a success story

Up until this point, DiskDigger has been built for the .NET Framework, with a user interface that uses Windows Forms. I’ve written before about my feelings on WinForms — that it’s a perfectly good, tried-and-true technology which, as ancient as it is, seems to have outlasted numerous other UI toolkits, for the simple reason that it just works.

image

However, it has bothered me for a long time that DiskDigger is not as cross-platform as I would like it to be. Sure, there was the excellent Mono project, with its independent implementation of Windows Forms that bridged the gap somewhat, and allowed DiskDigger to run on Linux, and perhaps even on macOS (albeit only on older 32-bit versions).

image

But recently, I decided to roll up my sleeves and take a serious look for a solution that would make DiskDigger truly cross-platform. I had the following rough requirements in mind when looking for a potential framework:

  • The framework should be built on .NET, since I’d like to reuse all of the business logic of DiskDigger, which is written in C#.
  • The toolkit of UI components should allow me to match the existing UI of DiskDigger without too much hassle.
  • The final output should ideally be a single, self-contained executable with no dependencies. There should not be any need for the user to “install” or “uninstall” anything. Installing should simply involve downloading and running the executable, and uninstalling should consist of deleting the executable when no longer needed.

The fact is, years ago I recall going through a similar process of investigating a cross-platform solution, but none of the frameworks I could find at the time seemed to be mature enough for me to commit to, so I kept putting it off, until an unpardonably long time afterwards, but better late than never.

Avalonia immediately jumped out as a strong contender. It is truly cross-platform, in the sense that you “ship the platform” along with your executable. This necessarily means that it will increase the size of the final executable, but I can deal with a moderate amount of bloat, as long as the end result is not like the monstrosities built with something like Electron, which need to ship the entirety of Chromium as their runtime, and make the final product into a 200MB behemoth. On this dimension, Avalonia performs relatively well: the final self-contained executable is about 60MB, and actually compresses nicely to a 30MB zip file for distribution.

.NET itself has also made its own strides in being able to bundle your app into a single executable, with a single command:

dotnet publish -c Release -r linux-x64 --sc -p:PublishSingleFile=true

…where the relevant parameters are --sc for “self-contained”, and the self-explanatory PublishSingleFile=true.

In terms of building your user interface, Avalonia seems to be a spiritual successor to WPF, and I’m embarrassed to say that I’ve never actually used WPF, either professionally or personally. It was an entire era of Windows UI development that I’d skipped over entirely. Because of this, I was a bit worried about the learning curve I’d have to endure to jump from Windows Forms directly to Avalonia. But my fears were unfounded: it didn’t take long at all for everything to “click”, because Avalonia encourages and expects you to use good architectural patterns like view models and data bindings, which I basically already had in place.

But here was the most pleasant surprise of all:
In my day-to-day work, I switch between my main workstation that runs Windows, and my MacBook Pro, and I’m able to work on the same projects for Android and the web on both machines. So I wondered how easy it would be to keep developing DiskDigger with Avalonia on my MacBook, instead of always having to develop it on my Windows PC.

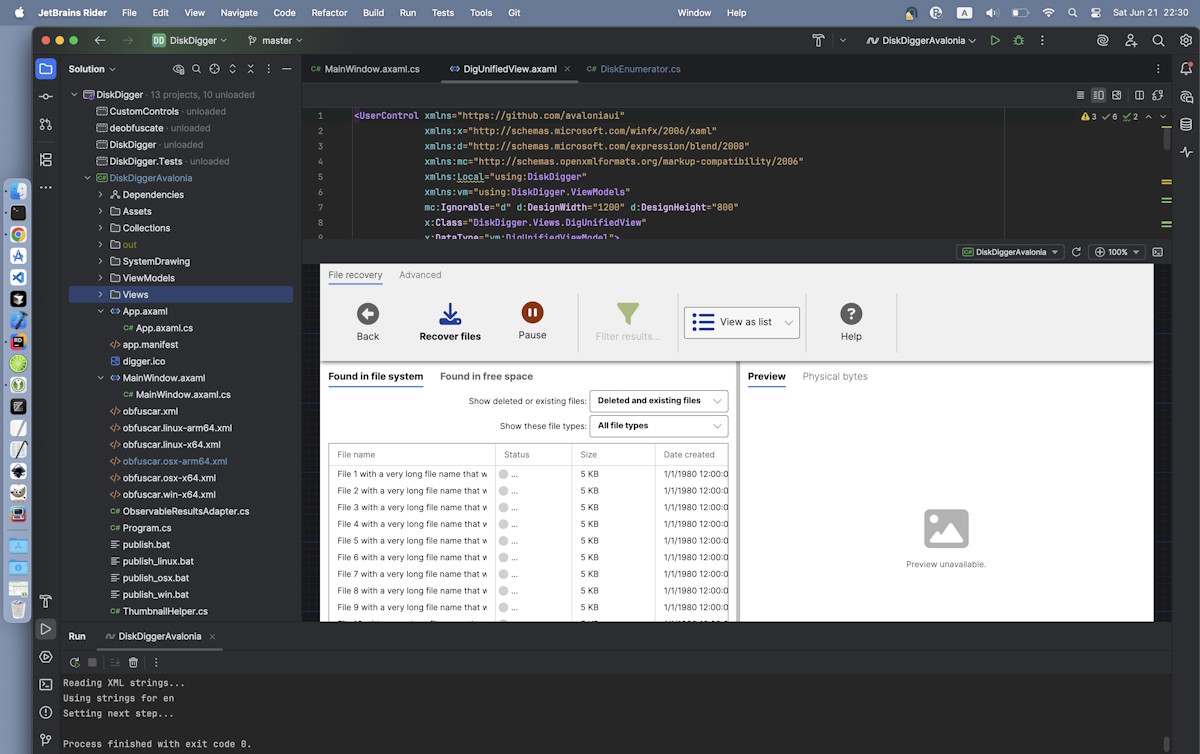
I downloaded Rider (the JetBrains IDE for working with .NET) on my MacBook, installed the Avalonia plugin, and opened my Visual Studio solution. And to my amazement, it just worked! The UI designer, the code completion, everything worked flawlessly, dare I say even better than Visual Studio itself. I was able to keep developing the Visual Studio solution, unmodified, on my Mac. At this point I was convinced that this was the right direction to go in.

image

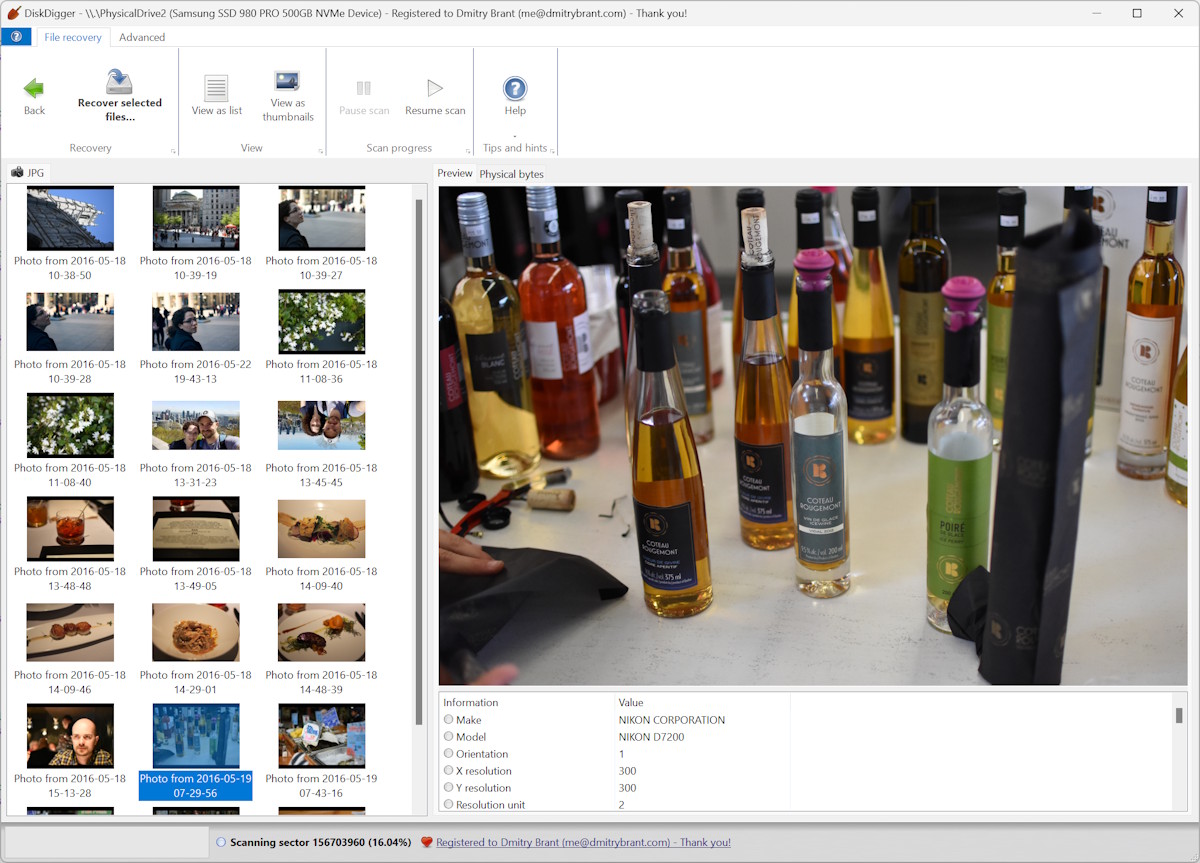
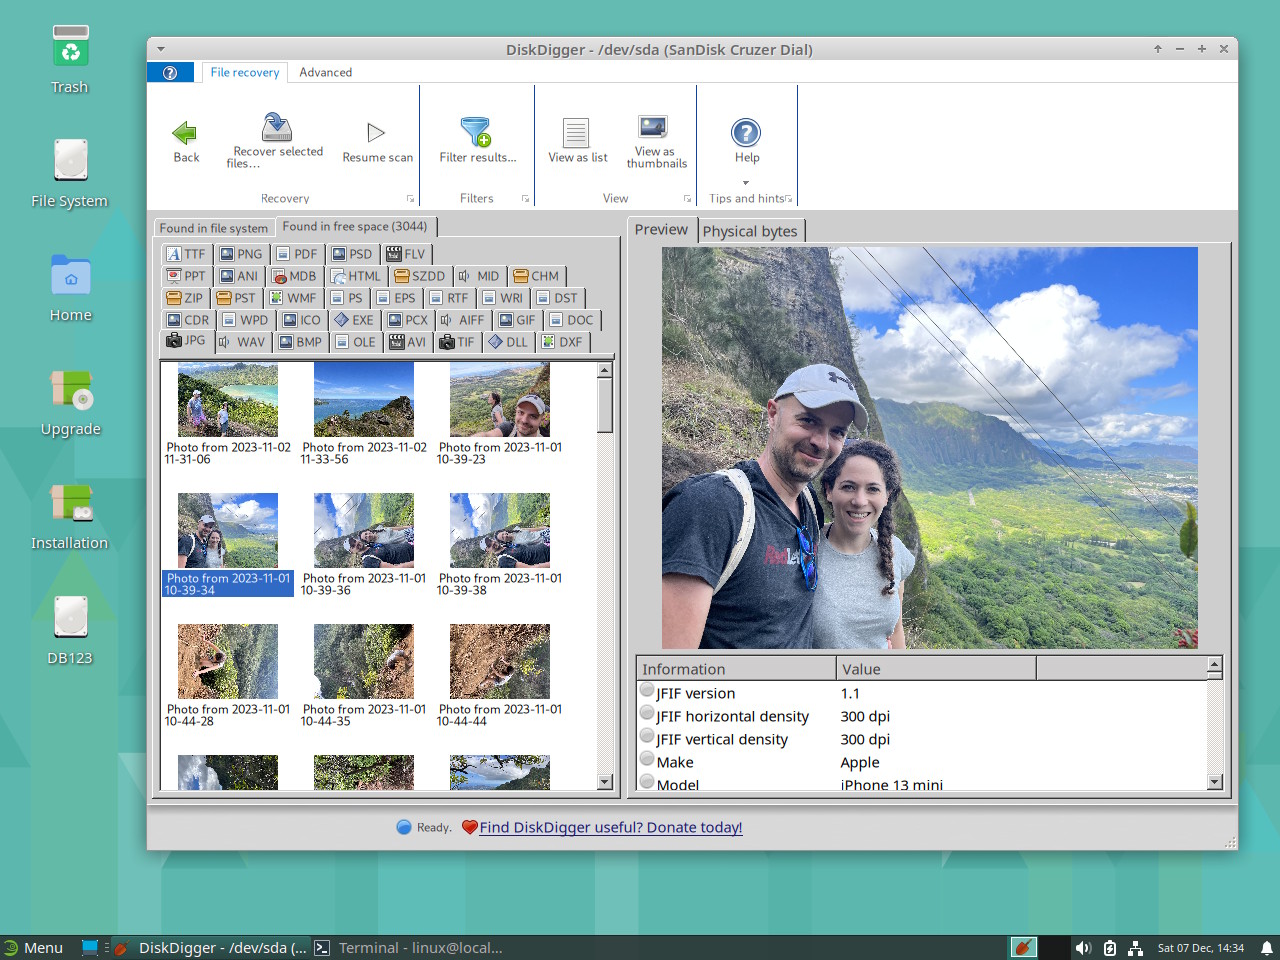
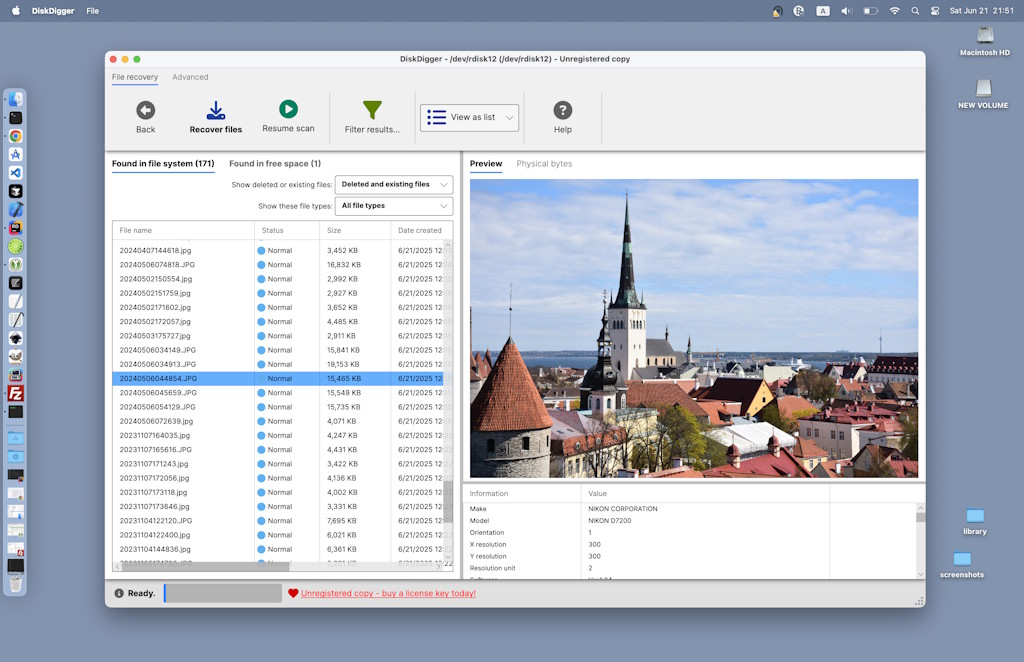
After plenty of help from the Avalonia documentation, and a little further help from Claude, I proceeded to rebuild one screen after another, until finally I had an MVP of the whole thing, with the whole process taking around four weeks. And at long last, may I present an experimental (but fully functional and complete!) version of DiskDigger, built with Avalonia UI, which can run not only in Windows, but in Linux and macOS!

image

Once again, this is just a Beta version so far, but it is perfectly usable on any platform, and I encourage you to try it and let me know your feedback. For now, I will continue development of this new Avalonia-based edition of DiskDigger in parallel with the existing WinForms-based version, which will still be the “recommended” version for Windows. But in the longer term, I can absolutely envision focusing solely on the Avalonia version, and letting the WinForms version ride into the sunset.

Brain dump, June 2025

In the course of my hobby of restoring old computers, I sometimes come across a laptop that has a broken floppy drive. This is almost always true for much older floppy drives that use a belt mechanism for spinning the disk, instead of a direct-driven spindle motor. These floppy drives are just the worst: the belt is nearly always broken, or too weak to work properly, rendering the drive useless. Replacements for these belts are impossible to obtain in the exact thickness and diameter, and wouldn’t really be a permanent fix anyway. So, rather than attempting to repair the drive with a new belt, I’d like to connect a more “proper” floppy drive, say, a known-good drive from another laptop, or even a drive from a desktop PC.

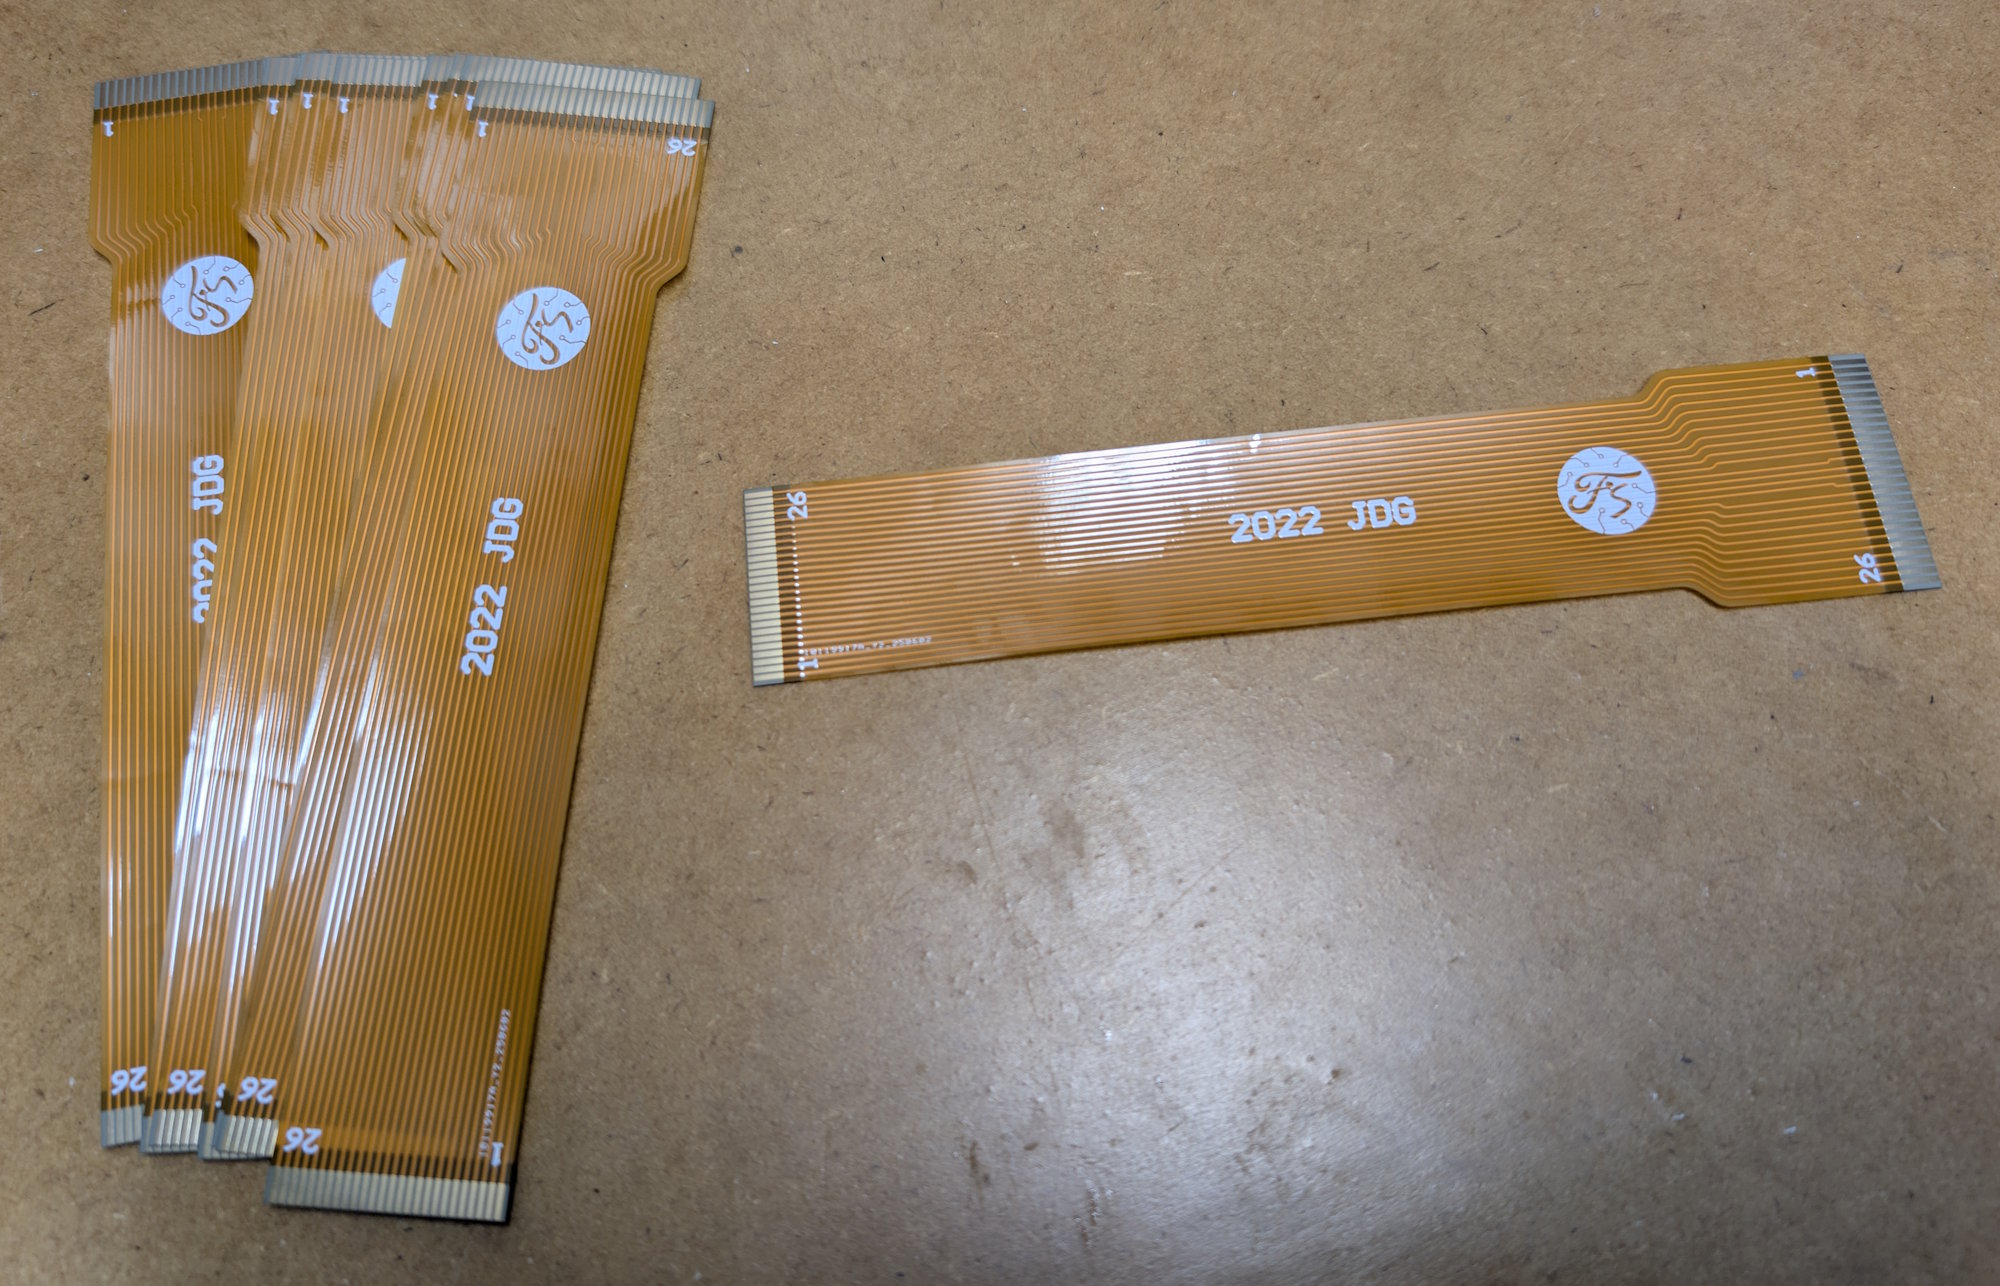
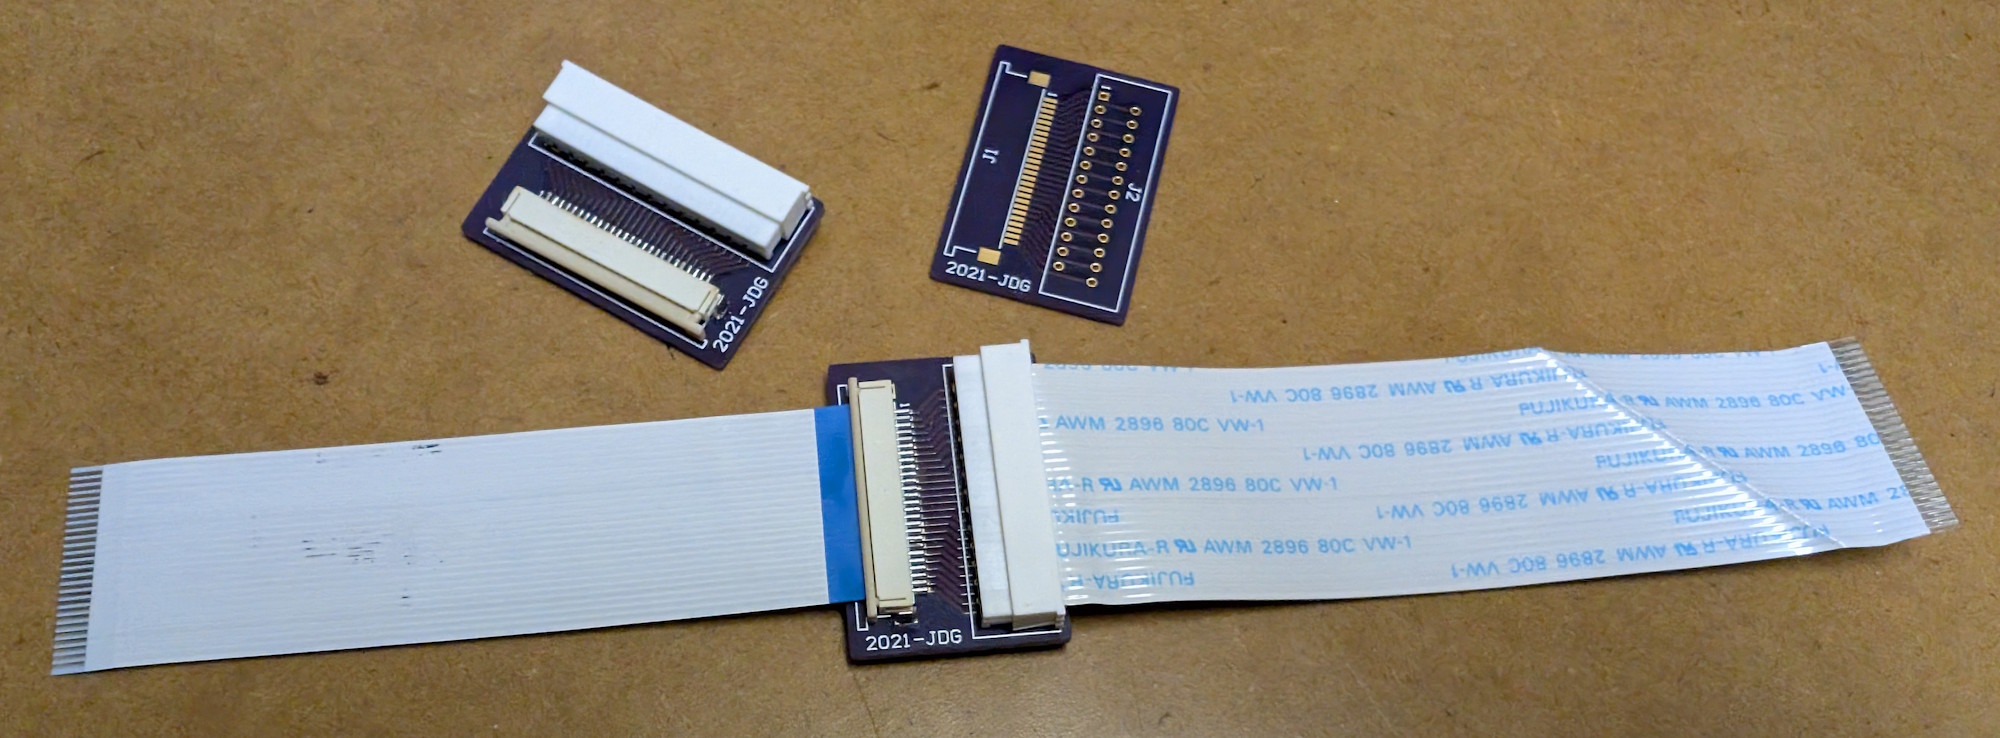
The problem is that older laptop floppy drives connect to a ribbon cable that is 1.25mm pitch, whereas newer laptop floppy drives use a 1.0mm pitch connector. If only there was an adapter that joins these two configurations… Fortunately there are open-source PCB designs for a couple of options: the first is a ribbon cable that is 1.25mm pitch on one end, and 1.0mm pitch on the other, and the second is a PCB that has both 1.25mm and 1.0mm connectors that are joined together. Either of these variations will work for my purposes, and I obtained both of them!

image

image

For both of the above options, you must use them in conjunction with a reverse-direction ribbon cable that will ultimately connect to the floppy drive.

This was actually my first time ordering custom-printed PCBs, and the experience couldn’t have gone smoother. It was also my first time using solder paste to solder a surface-mounted connector. That experience could have definitely gone smoother — my technique with solder paste needs a lot of refinement, but one step at a time. At least the adapter works!

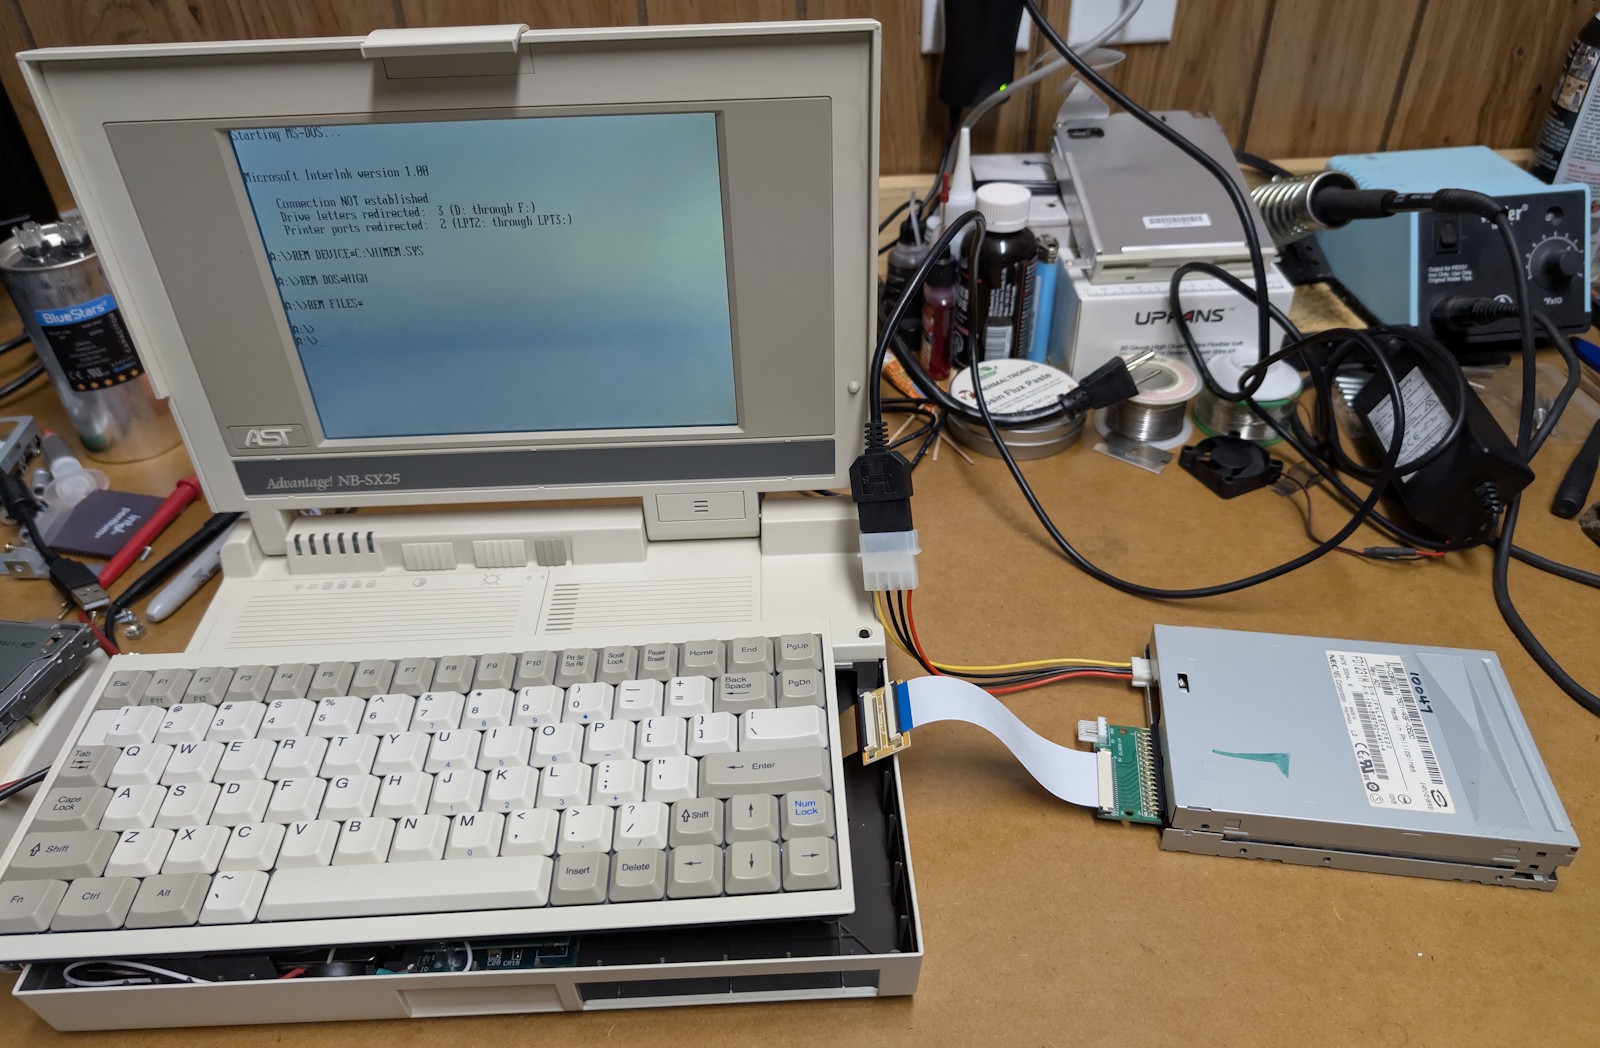
Here is an example Frankenstein experiment I tried: an AST Advantage NB-SX25 laptop, which I restored recently, communicating with a desktop PC floppy drive, with the help of the aforementioned 1.25mm-to-1.0mm ribbon cable (plus an adapter that goes from a 1mm ribbon cable to a 34-pin FDC connector, which is widely available on the web):

image


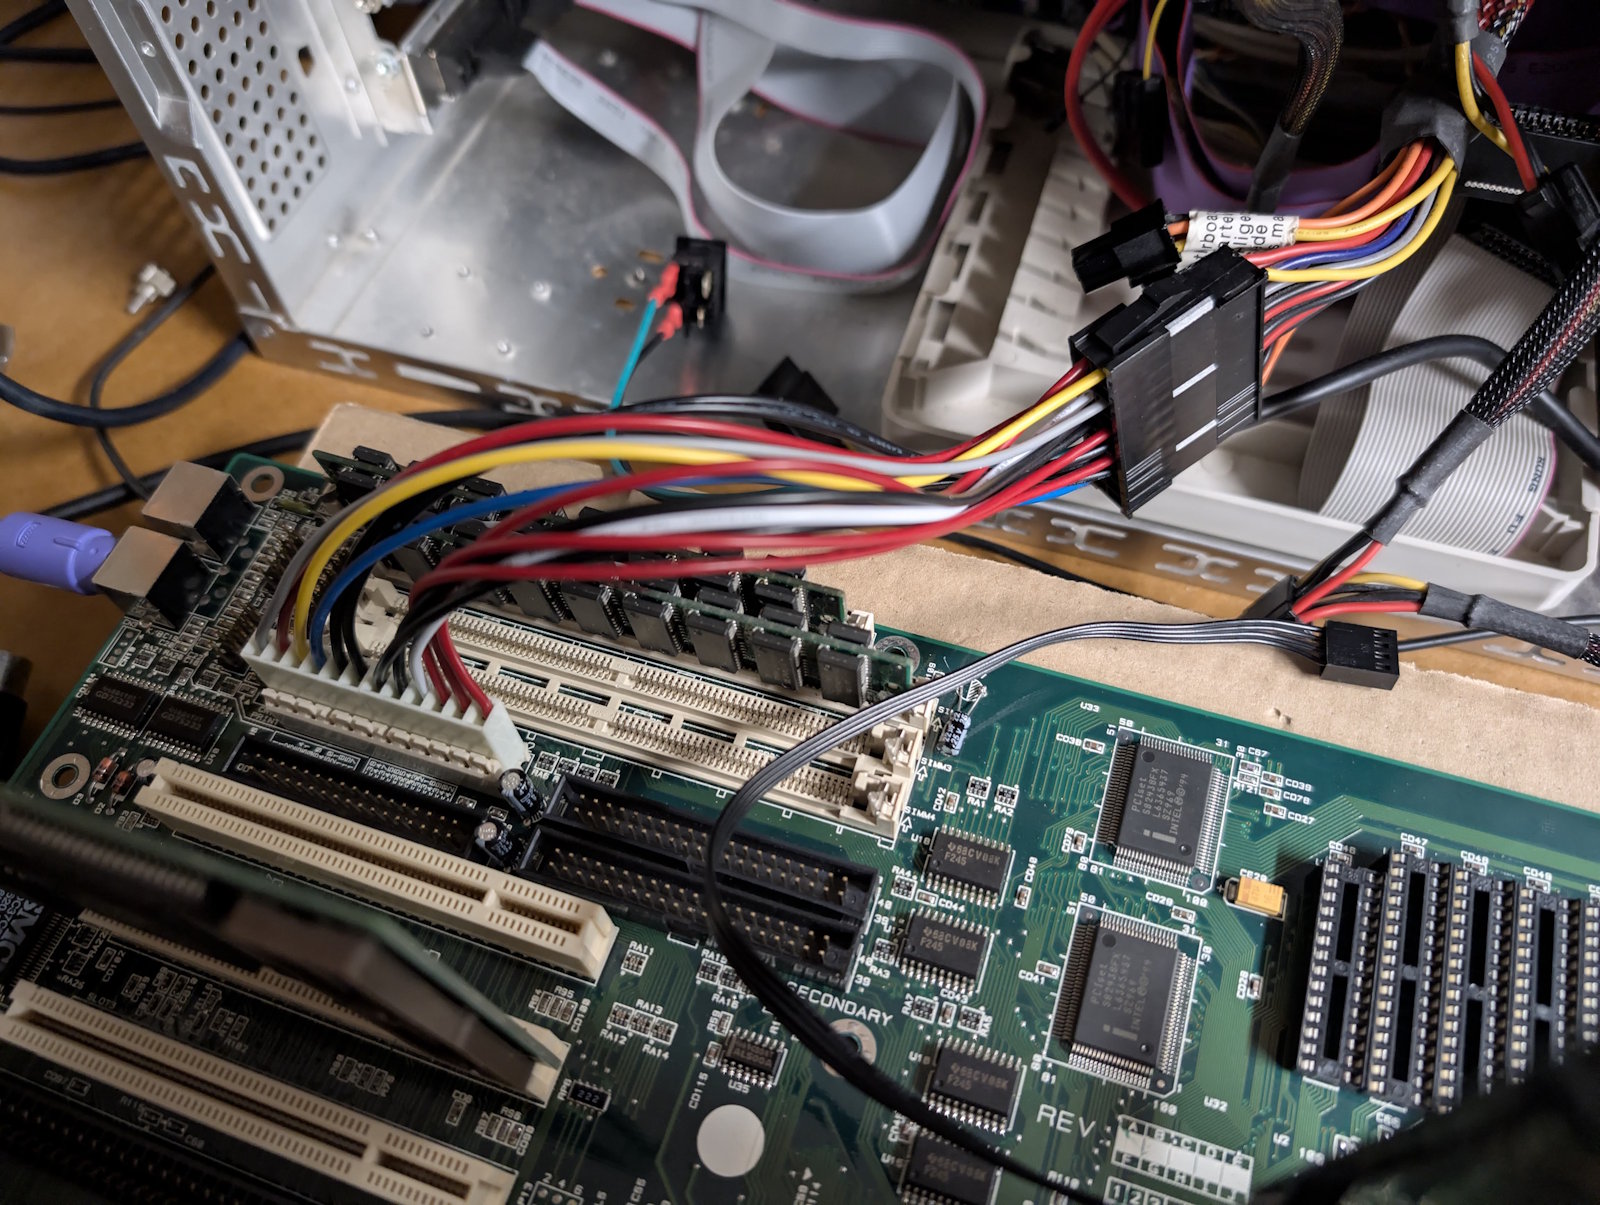
On a semi-related topic, what if you have an old motherboard that has an AT-style power connector (P8 and P9), but you only have an ATX power supply? Not to worry — there are readily available adapters that convert from ATX to AT connectors. However, here’s something to keep in mind: certain ATX power supplies require a load on the 5V rail in order to properly regulate 12V. The symptom becomes: you turn on the power supply, the motherboard starts to boot, but then suddenly shuts off after a few seconds. This is potentially the cause: instead of only connecting the P8/P9 connectors to the motherboard, you must also connect a load to 5V; a couple of fans should do the trick.

image

Software update roundup, February 2025

Time to mention some great updates in the newest versions of DiskDigger, as well as its cousin FileSystemAnalyzer, which is my “internal” tool for tinkering with various file systems.

ZFS

I’ve been embarking on a bit of self-study of the ZFS file system, specifically its on-disk structures, for the purpose of forensic analysis and opportunities for data recovery. DiskDigger (and FileSystemAnalyzer) now supports ZFS partitions on physical disks and disk images. At the moment it can only parse the current disk’s worth of the ZFS pool, i.e. it does not yet fully support pools that span multiple disks, but this will be updated soon.

FileSystemAnalyzer now lets you visualize and parse a ZFS partition in a couple of unique ways. First, you can select the uberblock from which to start parsing the file system. ZFS uses a round-robin list of uberblocks, where every new “transaction group” causes a new uberblock to be written or updated, and the uberblock with the highest transaction group number is the “active” one. This implies that “older” uberblocks could potentially point to file system structures that are deleted, or forensically interesting in other ways. FileSystemAnalyzer presents the list of potentially parseable uberblocks as separate “partitions”, which you can select:

image

I have definitely observed cases where deleting files causes a new “transaction group” to be recorded, which creates a new uberblock; and then parsing from the previous uberblock allows the deleted files to be seen.

Then when viewing the actual files in the ZFS partition, FileSystemAnalyzer lets you browse the raw “object list”, which is a flat list of objects that represent all the files and directories organized in the file system tree, but might also include items that are not present in the tree.

image

As an aside, although the design of ZFS is mostly very sound, I’m a bit taken aback by the complexity of certain portions of ZFS. For example, ZFS uses at least four different ways of storing key-value pairs, each for different purposes:

  • nvlist, for storing header metadata at the beginning of the file system.
  • SA (system attributes), for storing attributes for files and directories. Because ZFS is designed to be maximally versatile and cross-platform, the types of attributes associated with files and folders can be defined dynamically in a system-attribute registry stored in the metadata of the filesystem.
  • ZAP: this is the main storage mechanism by which the actual filesystem (files, directories, symlinks, etc) are structured, achieving a B-tree-like structure. However (!) ZAP offers two different ways of structuring it:
    • Microzap: When there are few enough entries, the structure becomes completely different, and more compact.
    • Fatzap: The actual, full-fledged mechanism for storing the file system tree.

UFS / UFS2 / Minix / Ultrix / Xenix

…Really, all Unix-like file systems. Or, I should say, all inode-based file systems. DiskDigger and FileSystemAnalyzer now have expanded support for more obscure and legacy Unix-like file systems, like Ultrix and Xenix, some of which have different versions that are mutually incompatible. If you have disk images of these types of very old operating systems, send them to me! I’m always looking for obscure stuff to test with.

Pick R83

The Pick Operating System, created by a guy whose actual name was Dick Pick, was a super interesting blip in computing history. Everything about this operating system is database-driven, including the file system, if you can call it that. The “account” that a user signs into is really a database, a “file” is really a table in the database, and then each file contains “attributes” and “records” that correspond to columns and rows. The Pick OS found its way into some niche markets, but obviously didn’t last against its larger competitors. It was, however, a bit ahead of its time with its database-centric design, and these ideas are arguably “coming back” in the form of NoSQL.

I’d like to add more meaningful support for Pick partitions in the future, but for now, you can in fact browse a Pick file system in a minimal way, and also see a list of raw on-disk “frames” that make up the Pick database:

image

Brain dump, January 2025

I’ve had some fun recovering data from two different types of SyQuest disks: SyQuest “SparQ” and “EZ 135” cartridges! These were made in the late 1990s, and were meant to compete with Iomega Zip and Jaz disks.

image

These types of cartridges come from a weird (and short) era that came after the reign of floppy disks, but before the reign of portable hard drives (and USB flash memory). These cartridges literally contain a hard disk platter, and when you insert the cartridge into the drive, it becomes a complete hard drive.

image

The flaw in this design, which is obvious today, and should have been obvious then, is that there’s a reason why hard drives are very tightly sealed: if a single grain of dust gets between the platter and the read head, it can cause a catastrophic head crash, which will cause permanent damage to the disk, and to the drive. And that’s exactly what happened: the failure rate of these disks was comically high, and likely contributed to the eventual demise of the SyQuest company.

For both EZ 135 and SparQ disks, I was able to find inexpensive drives on eBay that support these disks. These are both external drives, and connect to the PC’s parallel port. And in both cases, the drive was missing its corresponding power adapter (because of course the drive uses a proprietary power connector). Luckily, I was able to find photos on the web of the power adapters, and see their respective pinouts, which were printed on the underside of the adapter. In the SparQ case, the power supply outputs both 5V and 12V on different pins, which is identical to a standard PC power supply’s internal connections. This drive was probably intended to be adaptable to become an “internal” model. So, I simply soldered a spare 4-pin Molex connector onto the corresponding pins inside the drive, and it’s suddenly compatible with a PC power supply!

image

And in the EZ 135 case, the power adapter only outputs 5V, so I soldered a standard barrel connector onto it.

image

I was able to find a driver on the web that supports both of these drives over the parallel port, and can be installed under Windows NT. The driver installs itself as a “SCSI” adapter, and exposes the drive as a true removable disk, giving Windows block-level access to it, and assigning it a drive letter. Therefore, if you insert a cartridge into the drive, you can just access it through Windows Explorer just like any other removable disk.

image

This means it’s also possible to use lower-level disk tools for reading the disk. Since I wanted to perform “full” data recovery on these cartridges, I was interested in obtaining complete sector-level images of the disks. Windows doesn’t have a built-in tool similar to dd in Linux, but there is actually a special “third-party” version of dd for Windows, and it actually works in Windows NT. Since this tool is open-source, I took it and made a tiny enhancement to make it retry reading a sector if it fails. That was a bit of fun in its own right, since this tool is built using Borland Delphi, which required spinning up a Windows 2000 virtual machine and installing Delphi 7 to make it build.

These cartridges had a few bad sectors, and retrying reading a specific sector multiple times allowed it to eventually succeed (in a sort of “SpinRite” fashion). Using this tool, all of the disks were read successfully!

If you have SyQuest disks lying around, needing to be recovered (or any other data recovery needs), get in touch!