Brain dump, June 2025

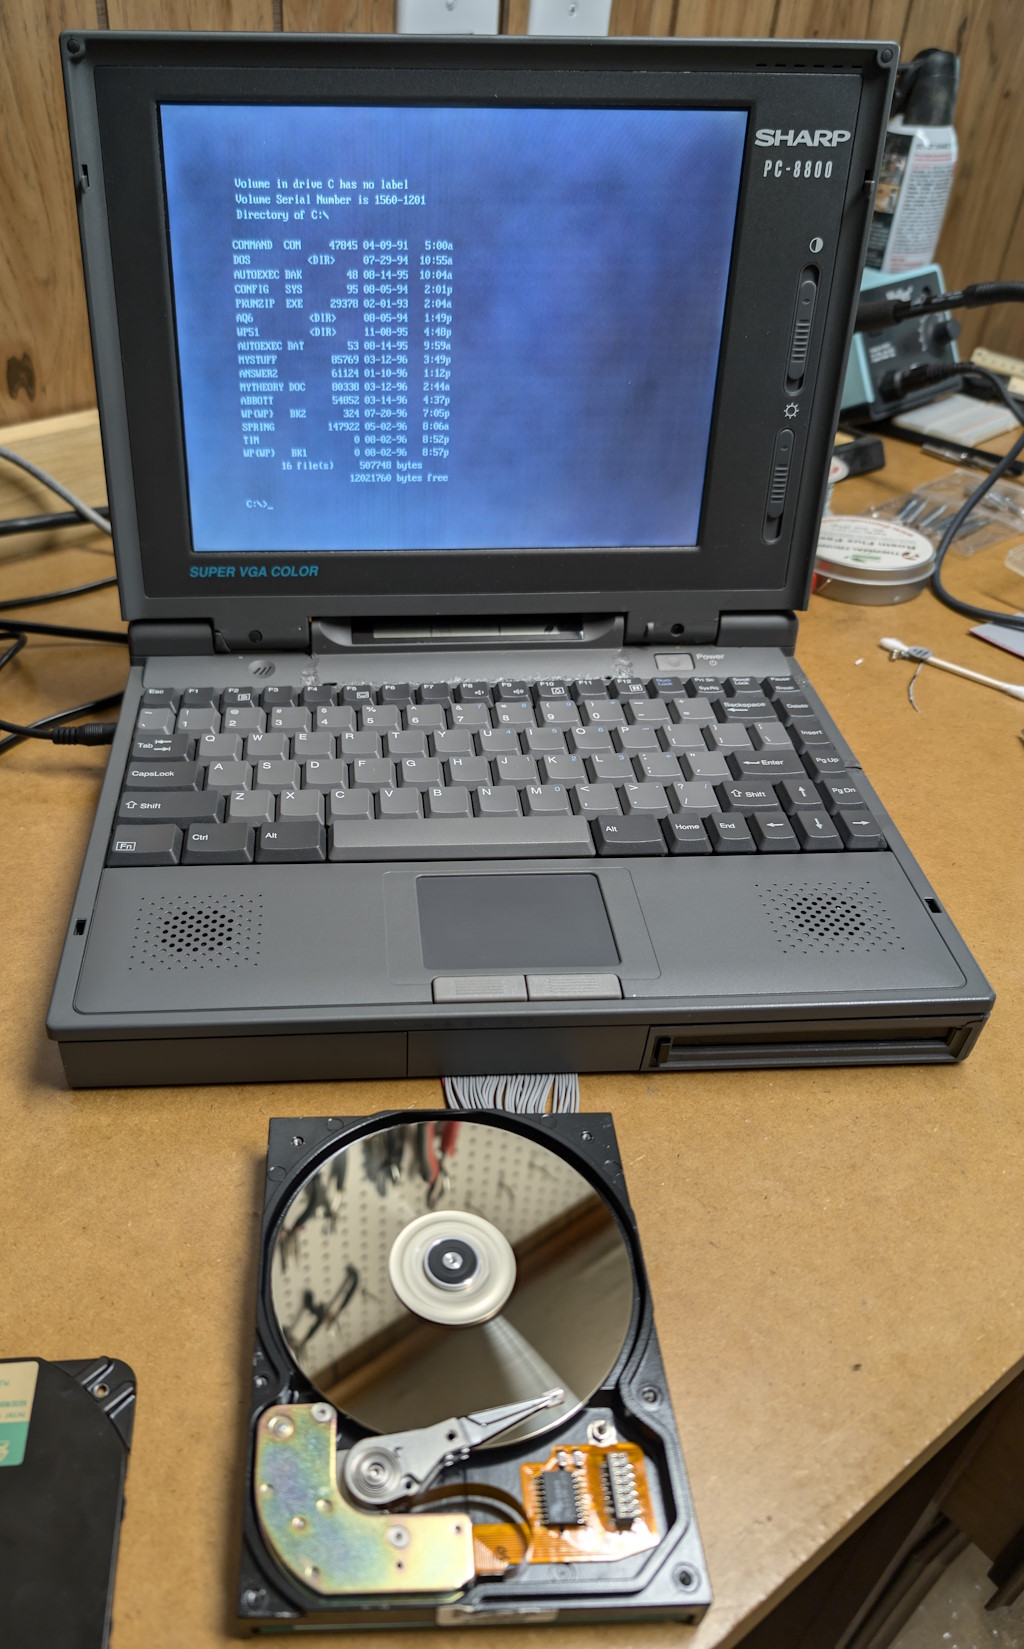
In the course of my hobby of restoring old computers, I sometimes come across a laptop that has a broken floppy drive. This is almost always true for much older floppy drives that use a belt mechanism for spinning the disk, instead of a direct-driven spindle motor. These floppy drives are just the worst: the belt is nearly always broken, or too weak to work properly, rendering the drive useless. Replacements for these belts are impossible to obtain in the exact thickness and diameter, and wouldn’t really be a permanent fix anyway. So, rather than attempting to repair the drive with a new belt, I’d like to connect a more “proper” floppy drive, say, a known-good drive from another laptop, or even a drive from a desktop PC.

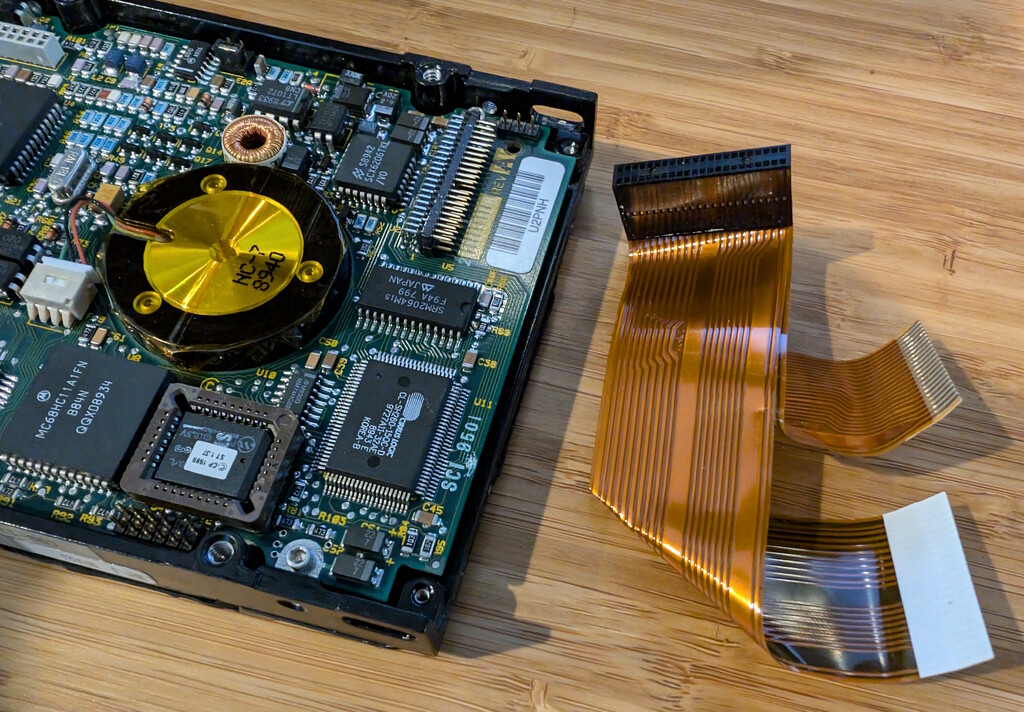
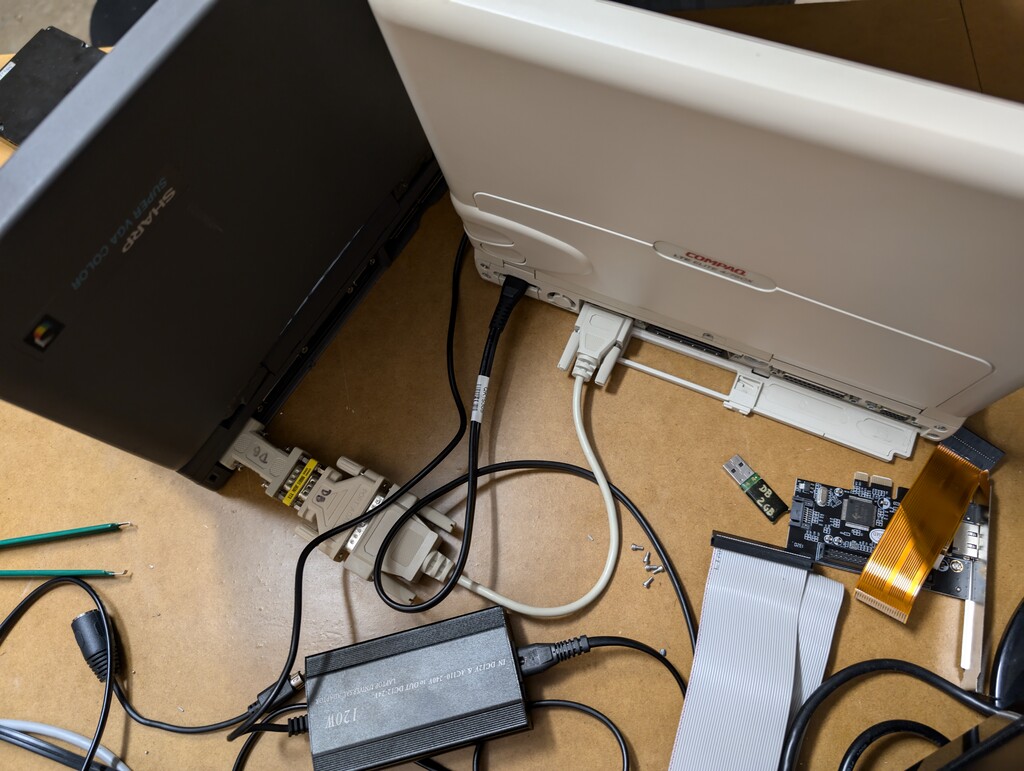
The problem is that older laptop floppy drives connect to a ribbon cable that is 1.25mm pitch, whereas newer laptop floppy drives use a 1.0mm pitch connector. If only there was an adapter that joins these two configurations… Fortunately there are open-source PCB designs for a couple of options: the first is a ribbon cable that is 1.25mm pitch on one end, and 1.0mm pitch on the other, and the second is a PCB that has both 1.25mm and 1.0mm connectors that are joined together. Either of these variations will work for my purposes, and I obtained both of them!

image

image

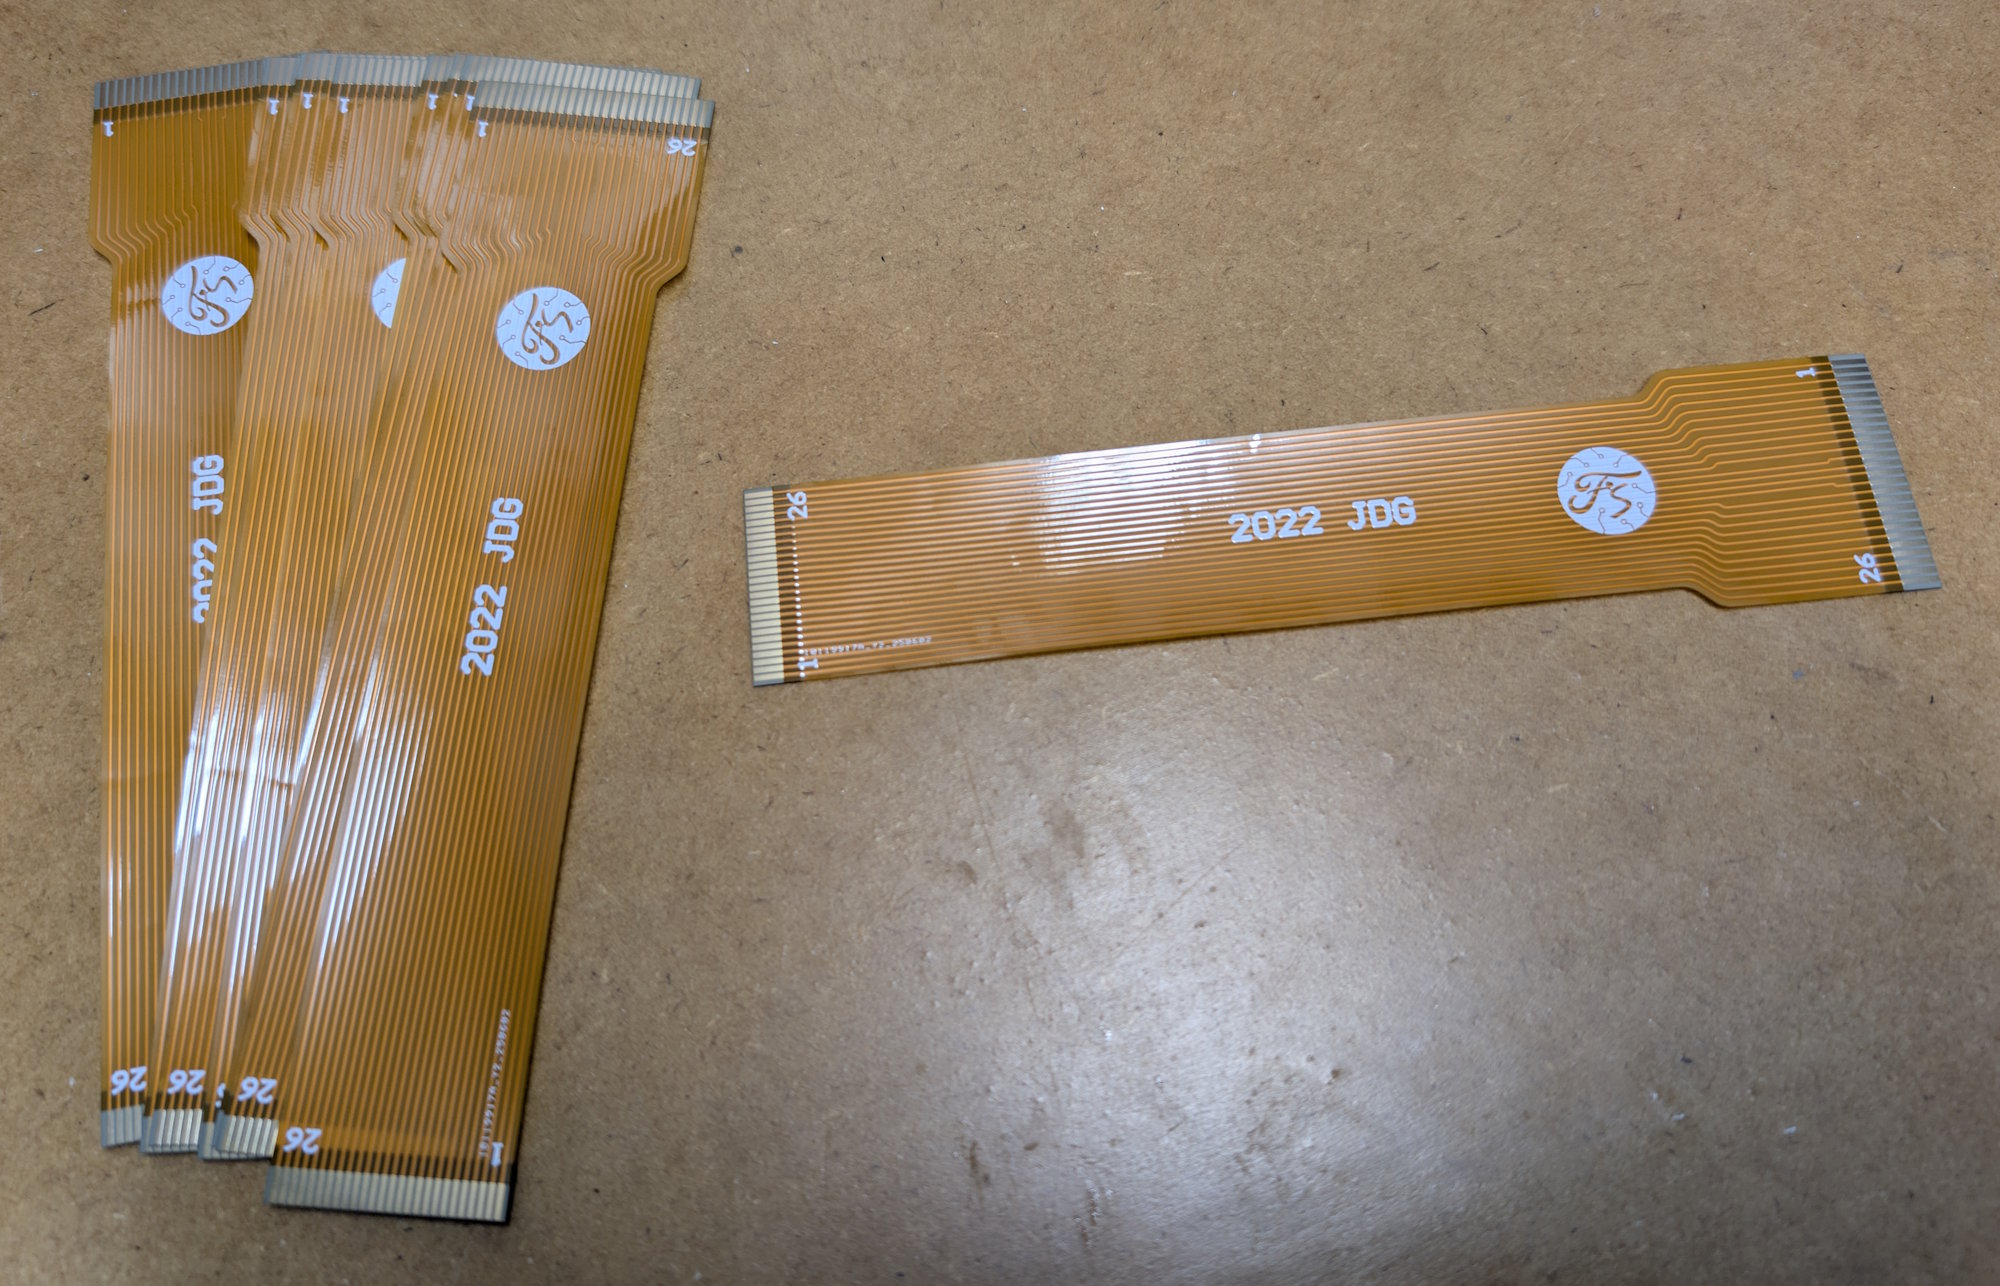
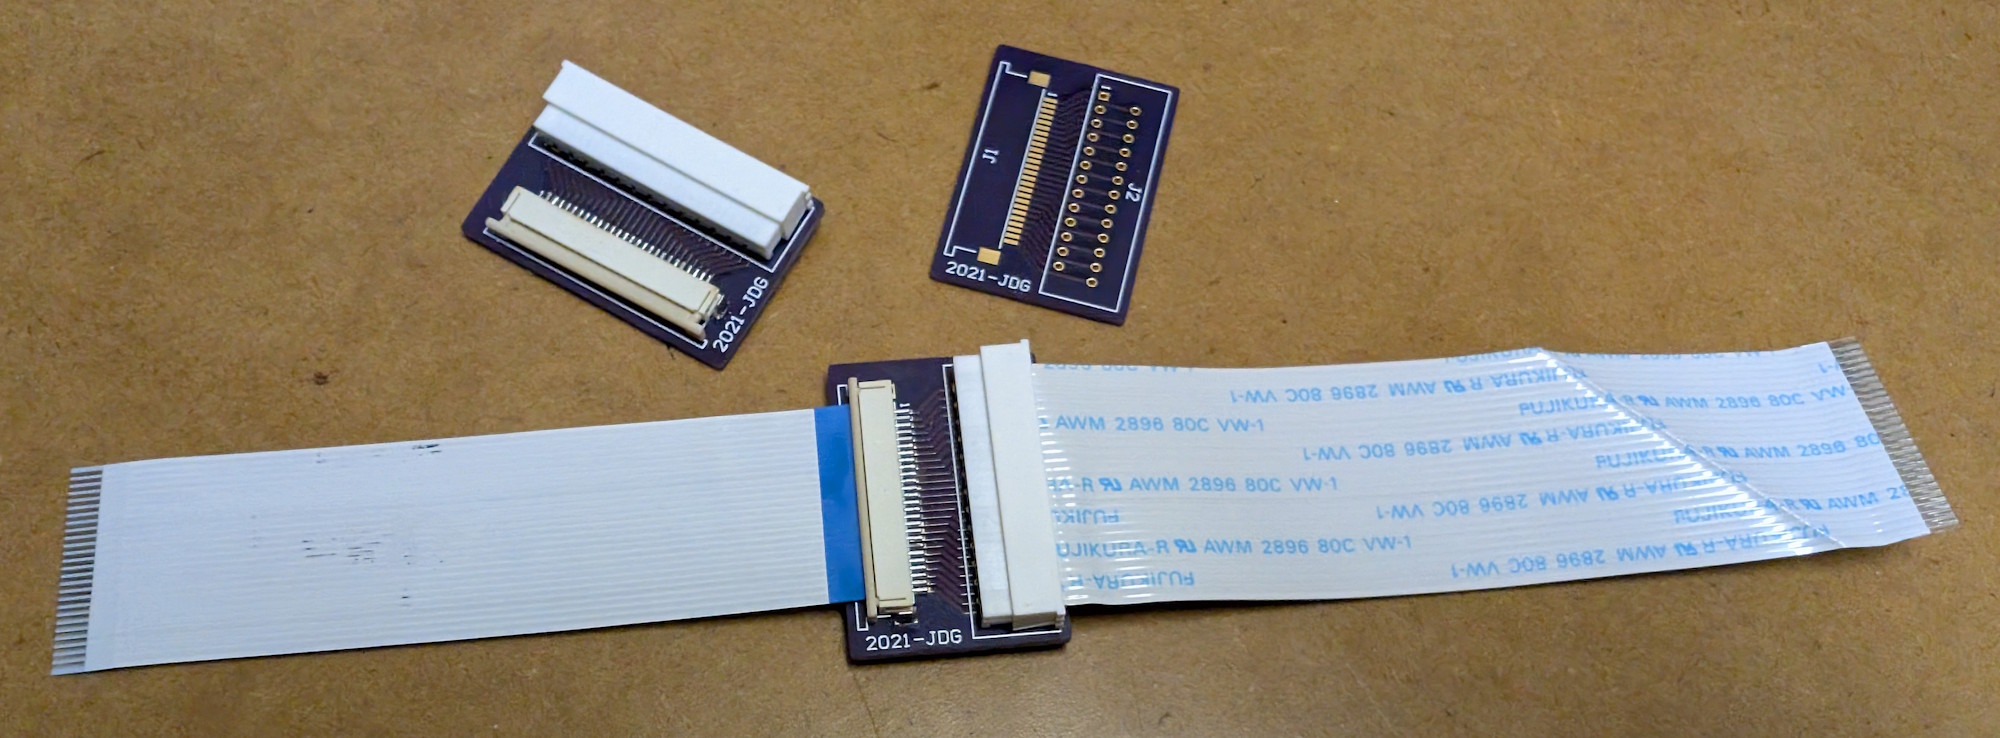
For both of the above options, you must use them in conjunction with a reverse-direction ribbon cable that will ultimately connect to the floppy drive.

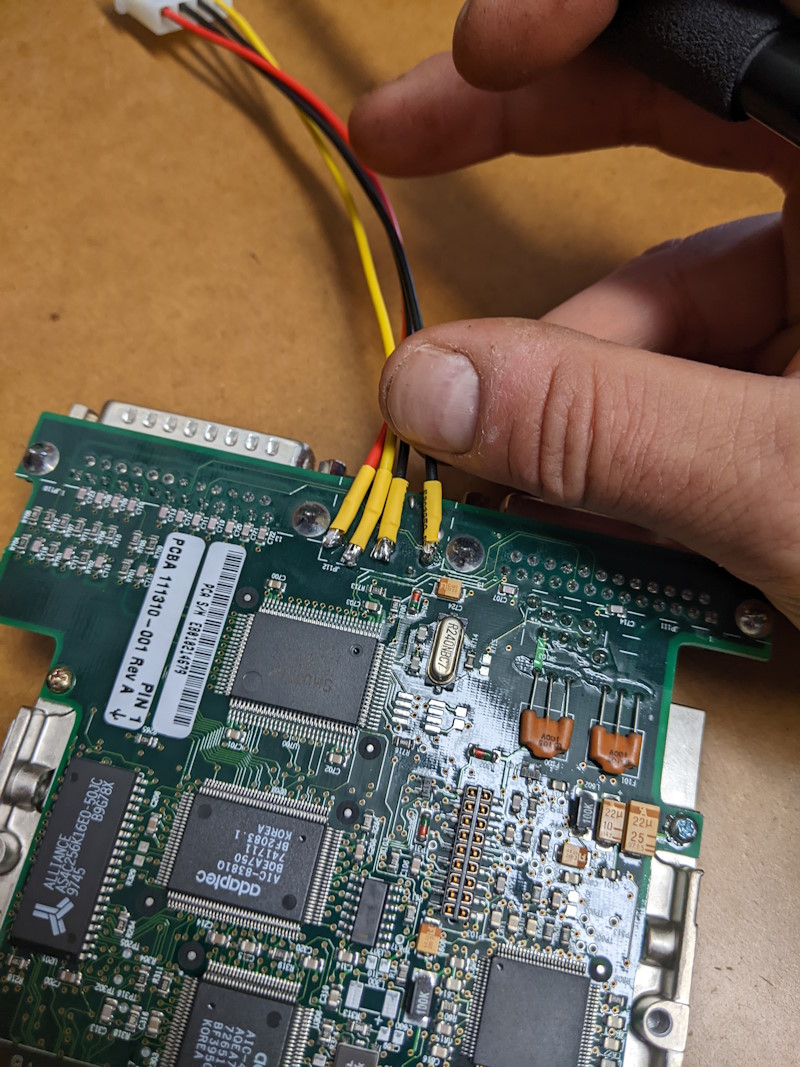
This was actually my first time ordering custom-printed PCBs, and the experience couldn’t have gone smoother. It was also my first time using solder paste to solder a surface-mounted connector. That experience could have definitely gone smoother — my technique with solder paste needs a lot of refinement, but one step at a time. At least the adapter works!

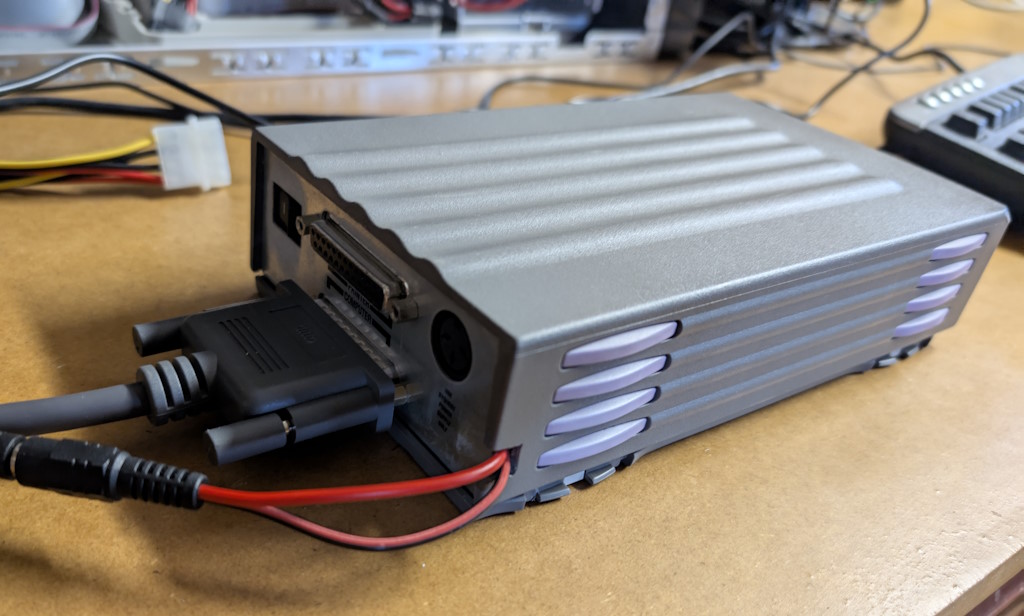
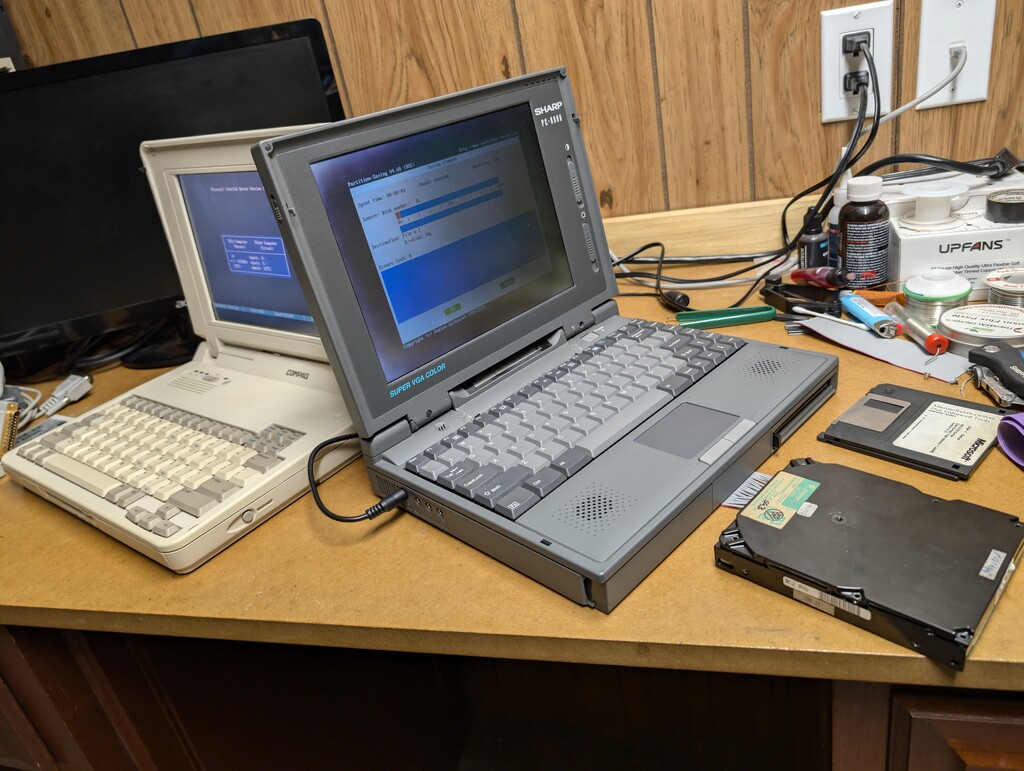
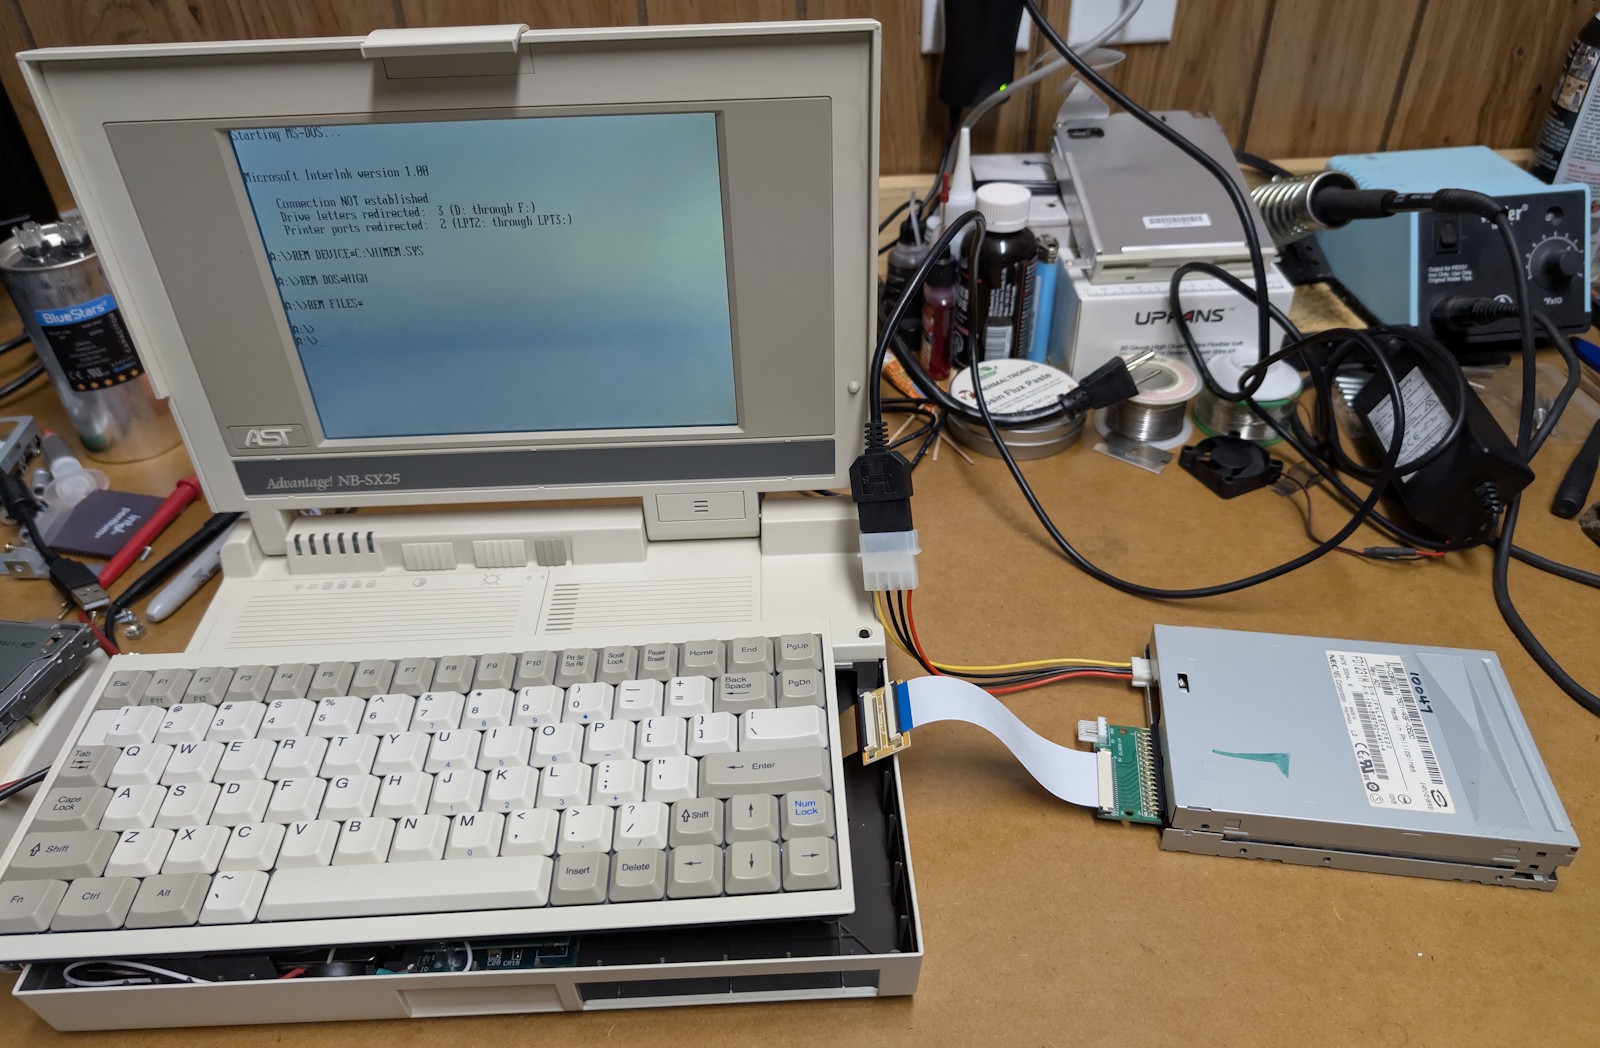
Here is an example Frankenstein experiment I tried: an AST Advantage NB-SX25 laptop, which I restored recently, communicating with a desktop PC floppy drive, with the help of the aforementioned 1.25mm-to-1.0mm ribbon cable (plus an adapter that goes from a 1mm ribbon cable to a 34-pin FDC connector, which is widely available on the web):

image


On a semi-related topic, what if you have an old motherboard that has an AT-style power connector (P8 and P9), but you only have an ATX power supply? Not to worry — there are readily available adapters that convert from ATX to AT connectors. However, here’s something to keep in mind: certain ATX power supplies require a load on the 5V rail in order to properly regulate 12V. The symptom becomes: you turn on the power supply, the motherboard starts to boot, but then suddenly shuts off after a few seconds. This is potentially the cause: instead of only connecting the P8/P9 connectors to the motherboard, you must also connect a load to 5V; a couple of fans should do the trick.

image

Software update roundup, February 2025

Time to mention some great updates in the newest versions of DiskDigger, as well as its cousin FileSystemAnalyzer, which is my “internal” tool for tinkering with various file systems.

ZFS

I’ve been embarking on a bit of self-study of the ZFS file system, specifically its on-disk structures, for the purpose of forensic analysis and opportunities for data recovery. DiskDigger (and FileSystemAnalyzer) now supports ZFS partitions on physical disks and disk images. At the moment it can only parse the current disk’s worth of the ZFS pool, i.e. it does not yet fully support pools that span multiple disks, but this will be updated soon.

FileSystemAnalyzer now lets you visualize and parse a ZFS partition in a couple of unique ways. First, you can select the uberblock from which to start parsing the file system. ZFS uses a round-robin list of uberblocks, where every new “transaction group” causes a new uberblock to be written or updated, and the uberblock with the highest transaction group number is the “active” one. This implies that “older” uberblocks could potentially point to file system structures that are deleted, or forensically interesting in other ways. FileSystemAnalyzer presents the list of potentially parseable uberblocks as separate “partitions”, which you can select:

image

I have definitely observed cases where deleting files causes a new “transaction group” to be recorded, which creates a new uberblock; and then parsing from the previous uberblock allows the deleted files to be seen.

Then when viewing the actual files in the ZFS partition, FileSystemAnalyzer lets you browse the raw “object list”, which is a flat list of objects that represent all the files and directories organized in the file system tree, but might also include items that are not present in the tree.

image

As an aside, although the design of ZFS is mostly very sound, I’m a bit taken aback by the complexity of certain portions of ZFS. For example, ZFS uses at least four different ways of storing key-value pairs, each for different purposes:

  • nvlist, for storing header metadata at the beginning of the file system.
  • SA (system attributes), for storing attributes for files and directories. Because ZFS is designed to be maximally versatile and cross-platform, the types of attributes associated with files and folders can be defined dynamically in a system-attribute registry stored in the metadata of the filesystem.
  • ZAP: this is the main storage mechanism by which the actual filesystem (files, directories, symlinks, etc) are structured, achieving a B-tree-like structure. However (!) ZAP offers two different ways of structuring it:
    • Microzap: When there are few enough entries, the structure becomes completely different, and more compact.
    • Fatzap: The actual, full-fledged mechanism for storing the file system tree.

UFS / UFS2 / Minix / Ultrix / Xenix

…Really, all Unix-like file systems. Or, I should say, all inode-based file systems. DiskDigger and FileSystemAnalyzer now have expanded support for more obscure and legacy Unix-like file systems, like Ultrix and Xenix, some of which have different versions that are mutually incompatible. If you have disk images of these types of very old operating systems, send them to me! I’m always looking for obscure stuff to test with.

Pick R83

The Pick Operating System, created by a guy whose actual name was Dick Pick, was a super interesting blip in computing history. Everything about this operating system is database-driven, including the file system, if you can call it that. The “account” that a user signs into is really a database, a “file” is really a table in the database, and then each file contains “attributes” and “records” that correspond to columns and rows. The Pick OS found its way into some niche markets, but obviously didn’t last against its larger competitors. It was, however, a bit ahead of its time with its database-centric design, and these ideas are arguably “coming back” in the form of NoSQL.

I’d like to add more meaningful support for Pick partitions in the future, but for now, you can in fact browse a Pick file system in a minimal way, and also see a list of raw on-disk “frames” that make up the Pick database:

image

Brain dump, January 2025

I’ve had some fun recovering data from two different types of SyQuest disks: SyQuest “SparQ” and “EZ 135” cartridges! These were made in the late 1990s, and were meant to compete with Iomega Zip and Jaz disks.

image

These types of cartridges come from a weird (and short) era that came after the reign of floppy disks, but before the reign of portable hard drives (and USB flash memory). These cartridges literally contain a hard disk platter, and when you insert the cartridge into the drive, it becomes a complete hard drive.

image

The flaw in this design, which is obvious today, and should have been obvious then, is that there’s a reason why hard drives are very tightly sealed: if a single grain of dust gets between the platter and the read head, it can cause a catastrophic head crash, which will cause permanent damage to the disk, and to the drive. And that’s exactly what happened: the failure rate of these disks was comically high, and likely contributed to the eventual demise of the SyQuest company.

For both EZ 135 and SparQ disks, I was able to find inexpensive drives on eBay that support these disks. These are both external drives, and connect to the PC’s parallel port. And in both cases, the drive was missing its corresponding power adapter (because of course the drive uses a proprietary power connector). Luckily, I was able to find photos on the web of the power adapters, and see their respective pinouts, which were printed on the underside of the adapter. In the SparQ case, the power supply outputs both 5V and 12V on different pins, which is identical to a standard PC power supply’s internal connections. This drive was probably intended to be adaptable to become an “internal” model. So, I simply soldered a spare 4-pin Molex connector onto the corresponding pins inside the drive, and it’s suddenly compatible with a PC power supply!

image

And in the EZ 135 case, the power adapter only outputs 5V, so I soldered a standard barrel connector onto it.

image

I was able to find a driver on the web that supports both of these drives over the parallel port, and can be installed under Windows NT. The driver installs itself as a “SCSI” adapter, and exposes the drive as a true removable disk, giving Windows block-level access to it, and assigning it a drive letter. Therefore, if you insert a cartridge into the drive, you can just access it through Windows Explorer just like any other removable disk.

image

This means it’s also possible to use lower-level disk tools for reading the disk. Since I wanted to perform “full” data recovery on these cartridges, I was interested in obtaining complete sector-level images of the disks. Windows doesn’t have a built-in tool similar to dd in Linux, but there is actually a special “third-party” version of dd for Windows, and it actually works in Windows NT. Since this tool is open-source, I took it and made a tiny enhancement to make it retry reading a sector if it fails. That was a bit of fun in its own right, since this tool is built using Borland Delphi, which required spinning up a Windows 2000 virtual machine and installing Delphi 7 to make it build.

These cartridges had a few bad sectors, and retrying reading a specific sector multiple times allowed it to eventually succeed (in a sort of “SpinRite” fashion). Using this tool, all of the disks were read successfully!

If you have SyQuest disks lying around, needing to be recovered (or any other data recovery needs), get in touch!

Brain dump, October 2024

Macintosh PowerBook 100

Restored another vintage laptop! This time, the patient is a Macintosh PowerBook 100, which came from a dear friend of mine who allowed me to restore it after recovering the data from its hard drive. The PowerBook 100 was clearly intended to be a “lower-end” model (even though it still had a price tag of $2,500 when it was launched in 1991), with a very minimal design, cheaper-feeling plastic, small monochrome 640×400 LCD display, and no built-in floppy drive. The upshot is that the inexpensive no-nonsense construction allowed for a fairly easy restoration!

image

When I attempted to power up the laptop as-is, it just made a few crackling noises through the speaker, and not much else. Otherwise it appeared dead. Time to open it up!

The top and bottom halves of the plastic casing are held together by three screws (!), and once these are removed, the entire thing pops open effortlessly.

Looking closely at the humble motherboard, I see the potential culprit right away: failed capacitors that have leaked and corroded. Hopefully the extent of the corrosion is minimal and didn’t affect any of the chips or other components besides the capacitors themselves. I’m hoping this could be as easy as re-capping the board, i.e. replacing the capacitors.

image

I proceeded to remove all the capacitors that had the slightest indication of corrosion, that is, any capacitor whose solder joints didn’t look totally pristine and shiny. And after removing each one, I cleaned the surface of any residue with alcohol, and then installed a new capacitor with the same value. In all, I replaced 10 bad caps, all of which were a small surface-mount variety, and were either 10µF/16V or 1µF/50V. My new caps are a bit longer than the old ones, so I oriented them horizontally on the board:

image

And, after reconnecting the display and keyboard back onto the motherboard, let’s try applying power again:

image

Hey presto, it’s alive!
A bit more cleaning of dust under the keyboard, removing the gunk from inside the trackball mechanism, and a general wipe-down of the exterior, and we’re ready to reassemble!

image

And there we have it, a lovingly restored PowerBook 100, with 2 MB of RAM, running System 7.0.1. The only unusual thing about it is the hard drive, which is a whopping 1 GB! This was clearly an upgrade from whatever hard drive it had originally (probably something like 40 MB), which must have been installed many years after it was purchased. This implies that the user of this laptop got quite a lot of mileage out of it, probably well into the late 1990s or even 2000s, which makes me happy.

Finally, to round out this restoration, let’s remove this hard drive and replace it with a CompactFlash card, preloaded with tons of vintage games and apps for the Macintosh.

image

The hard drive interface on the laptop is technically SCSI, so the original hard drive must have been a SCSI drive. The newer 1GB drive is an IDE drive, and came with an adapter board that fits underneath the drive, which translates between SCSI and IDE. This is quite convenient, since we can now plug in a cheap IDE-to-CF adapter, with a generously large CF card that will become our new hard drive. At last, let the retro gaming commence.

image

MC-3020-Extra tapes!

Recovered data from several MC-3020-Extra and QIC-3020 tapes. These “Extra” tapes have the same front-facing “interface” as their smaller QIC-3020 cousin, except these are larger length-wise, allowing for larger spools inside the cartridge, and therefore a higher data capacity. Of course these cartridges have the same fatal flaw as all other QIC tapes, which is the flimsy tension belt inside the cartridge that drives the motion of the spools. This belt is virtually guaranteed to fail over a long enough time, and since these “Extra” cartridges have even more moving parts inside, they are even more prone to failure.

image

image

This batch of tapes was in particularly rough shape: the tension belt in each tape was broken, and was also adhered to the surface of the tape medium. This was likely because the tapes were stored under excessive heat or humidity, which will cause the belt to break down and react with the tape itself. This required pretty extensive cleaning of all the gunk and pieces of belt that were stuck onto the tape.

Fortunately the tapes had been rewound properly, and the damaged portions of the tape were at a spot that was “beyond” the data area of the tape. After throwing on a fresh tension belt, and using one of my trusty Iomega Ditto drives (compatible with a wide range of this family of cartridges), I was able to dump and decode 100% of the data from them.

(As always, get in touch if you have any kind of vintage tapes or other media that you’d like recovered.)

Brain dump, September 2024

Custom IDE adapter for CP-4021 drive

As part of a special data recovery project, I needed to read the contents of the hard drive from an ancient Compaq LTE 8086 laptop. This hard disk, which is a Conner CP-4021, is quite an oddball. It has an unusual form factor: it’s a 3.5″ drive, but it’s slimmer and shorter than a regular drive, as if it was specifically made to fit into the LTE laptop.

image

Perhaps most annoyingly, the IDE connector on the drive is a very nonstandard half-pitch connector, where the pins have a horizontal pitch of 1.27mm, and a vertical pitch of 2.54mm. Inside the LTE laptop, this connects to a twin ribbon cable that goes directly to the motherboard, which basically means I have no way of connecting this drive to a “standard” modern IDE controller. (And it’s definitely an IDE drive, since the connector has 44 pins, just like any other laptop hard drive, and it has the same missing “key” pin as a standard IDE connector.)

Time to build a custom connector! After a whole lot of searching, I found a blank 50-pin header on AliExpress that should match the pitch of the drive’s connector. The 50-pin header will overshoot the 44-pin connector by a few pins, but it should still fit without issues. In an ultimate test of my fine motor skills, I soldered a spare 44-pin ribbon cable onto this 50-pin header, checking painstakingly that each pin on the female end matches the corresponding pin on the male end. To secure the delicate soldering onto the header, I covered it with clear epoxy, and let it harden overnight. And just like that, I have an adapter for connecting this ancient drive to a modern PC:

image

I then connected the drive to my workstation PC, and was encouraged when the drive spun up, and the PC detected the drive successfully! However, the PC didn’t seem to be able to read any actual data from the drive. After a good bit of head-scratching, and double-checking the continuity of all the pins of my adapter, and trying to connect the drive to a few other PCs, I had a last-ditch idea to rule out stuck heads or a locked spindle, which were rather common problems with older drives. I removed the top cover of the drive, exposing the heads and platter, and as the drive was spinning up, I gently turned the spindle manually away from its resting position. And wouldn’t you know it — this caused the spindle to come alive, and the drive became fully functional!

I was able to acquire an image of the drive in Linux with minimal effort (not a single bad sector!), and I’ll be keeping my fancy custom adapter in case I come across another drive like this in the future. I did a few more random Frankenstein experiments with the drive, including booting another vintage laptop from it:

image

…and connecting that laptop to another laptop via INTERLNK.EXE, which allows the C: drive on the “server” laptop to map as the D: drive on the “client” laptop, with the goal of transferring files from one to the other, or even dumping the entire partition, which I did with the SAVEPART tool.

image

image

The connection between the two laptops is a serial cable that I cobbled together from whatever I had on hand, which turned out to be an annoyingly short cable and, thankfully, a null-modem adapter, necessary for communication between the two serial ports. This resulted in a rather slow connection between the laptops; a parallel connection would be significantly faster, but I don’t have the appropriate cable. The INTERLNK tool (bundled with MS-DOS) worked just fine, and automatically detected the connection over the COM port.

T48 chip programmer, finally

I splurged on a proper chip programmer, the T48 by XGecu. Even though there is already a newer model of their programmer (the T56), the extra cost didn’t justify the few additional chips and features it supports, at least for me.

Along with the T48, I purchased a batch of random EEPROM chips for some initial testing and verifying of the T48 itself, and possibly for actual use in future projects. These are Winbond W27C512 chips, which have a rather unusual erase voltage of 14V and programming voltage of 12V, which will be a good exercise for the chip programmer.

image

The software for the T48 is for Windows only (there is an open-source alternative that supports an earlier model of this programmer (the TL866II), but it still has very limited support for the T48). And because the software is for Windows only, and especially because it requires a special driver which can only be installed with elevated privileges, I prefer to run it in a virtual machine, for reasons that I hope are obvious. Fortunately this is done very easily in VirtualBox, which supports USB passthrough effortlessly. Here it is, running in a Windows 7 (32-bit) VM, and communicating with the T48:

image

Since my batch of Winbond chips was suspiciously cheap, I assumed they were not “new”, but rather pulled from existing boards. And I was not mistaken: reading the chips, which worked absolutely fine, revealed that they already had contents in them:

image

And then, erasing and reprogramming the chips also turned out to be a breeze, which gives the T48 programmer a thumbs-up from me. As a special bonus, I removed the firmware chip from the Conner CP-4021 drive (mentioned above!) and was able to read the firmware, using one of the myriad adapters that were included with the T48 programmer.

image

The above chip is a Microchip 27C256 (32KB), in a PLCC-32 socket. Again, the T48 was able to read this 35-year-old chip without any issues, which makes me look forward to reading and programming many vintage and newer chips in the future.