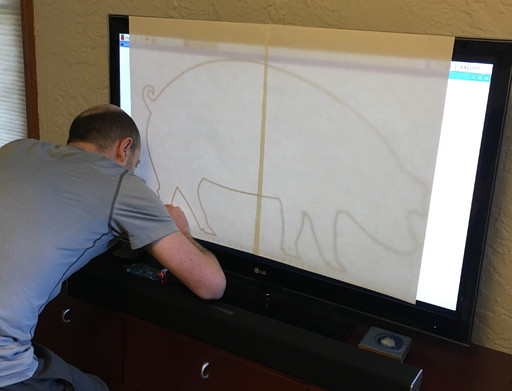
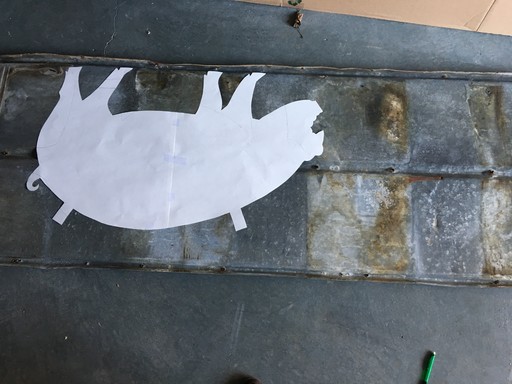
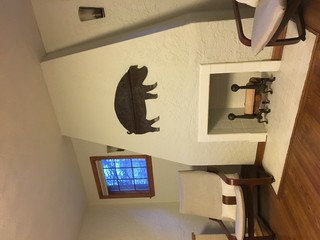
Here’s what you get when you combine a trip to the scrap metal store, a pair of tin snips, and a few minutes fiddling with Inkscape! (Credit goes to my wife, as it does for most home decoration ideas.)
My kitchen, like many other kitchens, has a built-in dishwasher. It’s an older dishwasher, probably more than ten years old, but it still works perfectly well. It’s also nicely designed on the inside, and has simple and intuitive controls.
However, my favorite thing about the dishwasher is what happens at the end of its wash cycle: it plays this really charming, corny jingle to indicate that it’s done. It’s just a few notes, and it lasts for just two or three seconds, but for some reason this jingle never fails to make me smile, and after a bit of reflection, I think I understand why:
I like when it’s obvious that the designers of a product had fun making it, and wanted to pass the fun along to the consumer in the form of a “signature” of sorts. The design of their product is so competent and so mature, that they can go beyond our baseline expectations and appeal to a higher-level aesthetic.
I think that’s the ultimate ideal to strive for: make the core functionality of your product work so well that you have enough design bandwidth left over to “show off” a bit. In other words, make your work seem effortless.
In case you’re not aware, I offer a service for recovering data from old or obsolete storage media, such as magnetic tapes, Zip drives, floppies, etc. One of my recent cases, from a rather prominent client, was interesting enough to warrant a detailed write-up. The task was to recover a backup from a QIC-150 tape. I’m no stranger to recovering data from these tapes, so I thought that this case would be fairly routine. However, it turned out to be a bit more involved, in a number of fascinating ways.
First was the matter of hardware: my go-to drive for reading the tapes was my Archive Viper 2150S. However, when I unpackaged it from its static bag, I noticed a black goo all over it. It turned out that the rubber wheel attached to the capstan that drives the tape reels had completely melted! I must have stored the tape drive in excess heat, causing the rubber to melt, and rendering the drive unusable. I proceeded by replacing the drive with a Tandberg TDC 3600, a mere $50 on eBay. (Lesson learned: store tape drives in a cool, dry place!)
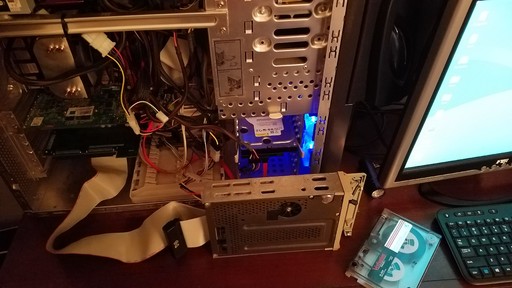
Anyway, I proceeded to attach the tape drive to my usual SCSI setup, which includes a Adaptec AHA 2940UW host adapter, which had served me well in the past, and proceeded to boot into the latest version of xubuntu (16.04), thinking that all I’d need to do is dump the tape contents by calling:
$ sudo mt -f /dev/nst0 rewind

$ sudo dd if=/dev/nst0 of=tape.bin
The above commands worked, but it only retrieved about 20MB of data, whereas my client was certain that the backup was at least 100MB (and the tape capacity is 250MB). I quickly realized that the tape contains multiple “files” worth of data. Even though tapes do not have a file system of their own, they do indeed have the notion of “files” stored sequentially along the tape stream, sometimes referred to as “records”. This tape turned out to have five of these files, each 20MB in size, totaling just over 100MB as expected. Tip: to continue reading the “next” file on the tape once the previous file is finished, it suffices to simply execute the same dd command above, with a different output file name. It’s also possible to fast-forward or rewind to any file location by calling:
Go backward one record:

$ sudo mt -f /dev/nst0 bsfm 1

Go forward one record:

$ sudo mt -f /dev/nst0 fsf 1
Having the tape contents dumped, next came the task of identifying the format of the data contained in the dumps. My client initially thought that the tapes were Unix backups saved with the tar command, which would have been convenient, but this turned out not to be the case. The binary format of the dumps was not any format that I recognized. Fortunately, after the client looked at the binary data, he guessed that the backups may have been from an old Macintosh computer, and that the backup software was Retrospect.
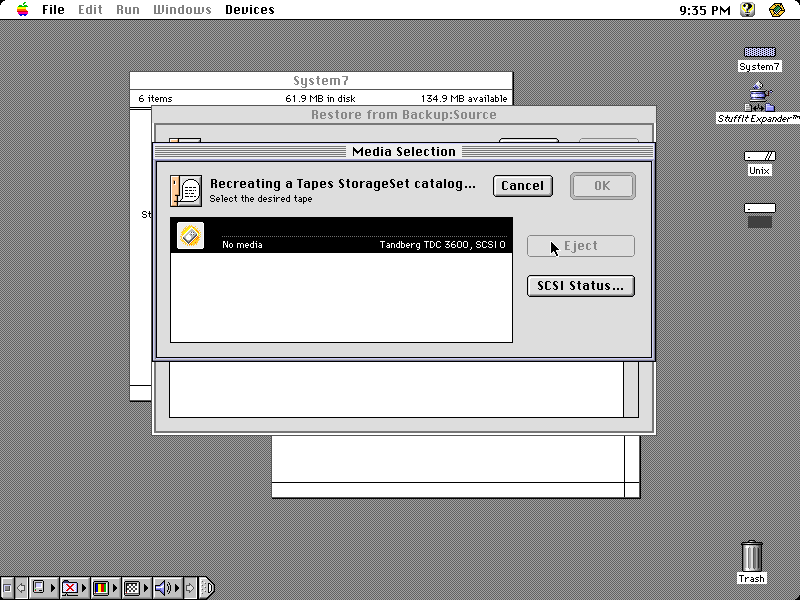
My thinking then was to set up an emulated Mac environment, install an old version of Retrospect on it, and try using it to “restore” the data from the binary dumps. The most robust emulator of old Mac architecture is Basilisk II, and fortunately I already had a basic pre-made emulated environment running System 7.5. I then managed to find an ancient version of Retrospect on an abandonware website, and installed it in the emulated system. However, when trying to restore data from the backup – no luck. Retrospect was actually able to read the internal name of the backup (which means that it definitely came from Retrospect), but couldn’t read its catalog contents. It was becoming clear that Retrospect must have had a special proprietary format for saving the data onto a tape. If only there was a way to “trick” the software into thinking that it was reading the backup directly from a tape drive…
After some more researching and digging, I found that Basilisk II has an extremely powerful option that makes it able to have pass-through access to the physical SCSI bus on the host machine! All it needs is to add this line to its initialization file (.basilisk_ii_prefs):
scsi0 /dev/sg2
In the above line, /dev/sg2 points to my actual tape drive, represented as a generic SCSI device in Linux. Amazingly (almost miraculously), this worked, to the point of the emulated Retrospect being able to detect the SCSI tape drive, and read the catalog contents of the backup!
However, next came the final hurdle. Although it was able to read the catalog, when I asked it to actually restore the files, it did nothing. It just sat there indefinitely. It was so close! It was literally showing me the contents of the backup, but it wouldn’t budge on actually recovering them. Is it a faulty tape drive? Is it an incompatibility between the emulated SCSI driver and the actual hardware? Is it a bug in the backup software?
I continued by recompiling Basilisk II with debug options turned on, particularly enabling debug output in the SCSI modules, since I wanted to see exactly what kind of SCSI commands the emulator was trying to send. All of the I/O was looking normal, until I made the request to restore the backup contents (which was making it hang). The emulator requested to read a block of 6MB of data from the tape. I thought, “that’s a rather large amount.” Does the emulator actually have enough RAM to hold that much data? Yes indeed, in the emulator’s configuration, I was giving it 32MB of RAM.
And then, it finally dawned on me: does the tape drive actually support returning that much data at once? Probably not… but how do I reduce the amount of data that the backup software asks for? The answer: give the emulator less RAM, which will constrain the maximum buffer size that it can request! I tried giving it 4MB, but this was too little to allow the backup software to read the catalog contents into memory. I bumped it to 6MB and… everything worked. I watched in amazement (and relief) as the restoration was really happening – emulated backup software was communicating with a real SCSI device!
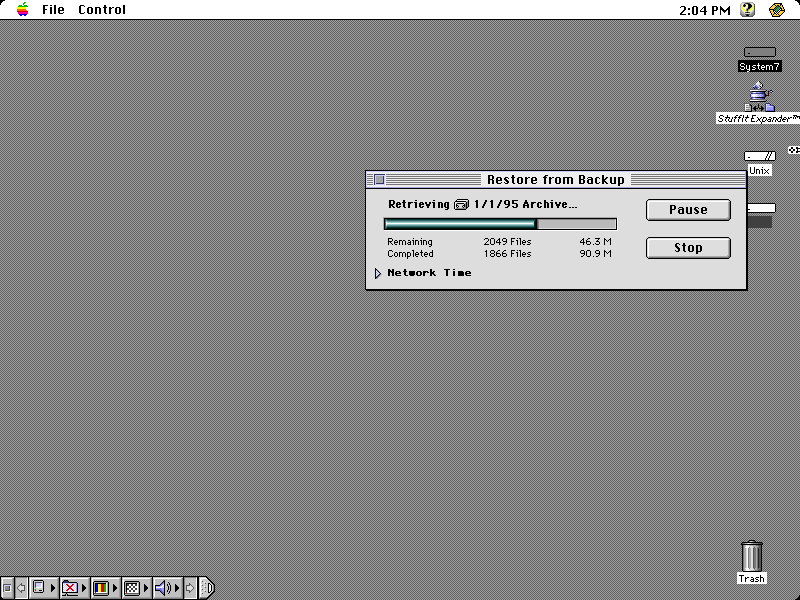
All that was left was to copy the restored files out of the emulator and into my “real” PC, which is easy since Basilisk II can actually mount a Linux directory as a drive within the emulated Mac. That’s it!
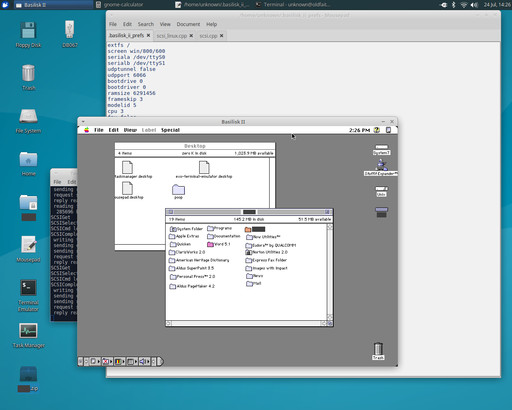
During this experience, what impressed me the most was the quality of the Mac emulator (Basilisk II), and how powerful its features actually are. The author of this software deserves huge kudos for creating it, and making it available for everyone. And of course, this is further proof that my obsession with emulators sometimes pays off!
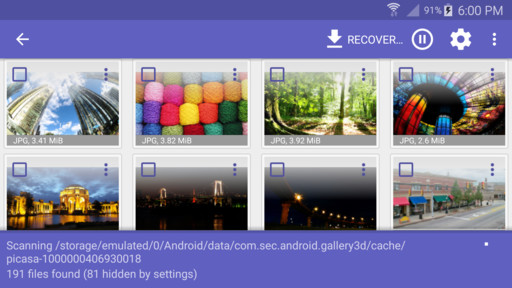
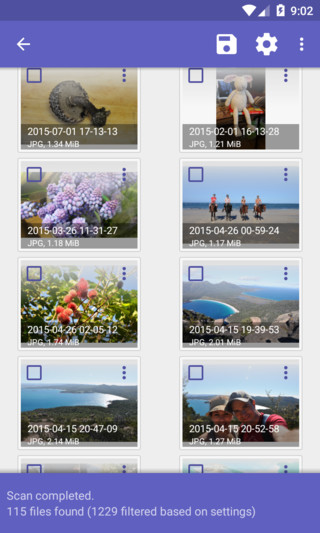
Huge news! The DiskDigger app for Android no longer requires the device to be rooted. To be more precise, the app will still work better on rooted devices (it will scan more thoroughly, and rooting is still recommended), but it now has basic functionality to recover photos even on regular non-rooted devices!
If your device is not rooted, DiskDigger will now perform an exhaustive scan of the various caches that your device maintains. These caches often contain lower-resolution versions of the photos on your device. When one of the original photos is deleted, the cached version does not get deleted, allowing DiskDigger to find and recover it for you. This means that, on non-rooted devices, DiskDigger will generally recover lower-resolution versions of your deleted photos. This is a limitation that cannot be overcome at this time (or without rooting).
Of course, if your device is rooted, DiskDigger will continue to perform as it has been, scanning the entirety of your device’s memory for all traces of photos and other types of files.
The app has also been updated to fully support Android Marshmallow (6.0). So, what are you waiting for? Install DiskDigger on your Android device, and see what it can recover!
I’ve just published some long-awaited updates for the DiskDigger app for Android! A lot of its low-level recovery logic has been updated, allowing it to provide you with all of this new functionality:
So, wait no longer: get DiskDigger or DiskDigger Pro from the Google Play Store today! And don’t forget – DiskDigger for Windows remains an excellent choice for your recovery needs on your desktop PC, with more updates coming soon.