Proper wiping of free space on your Android device

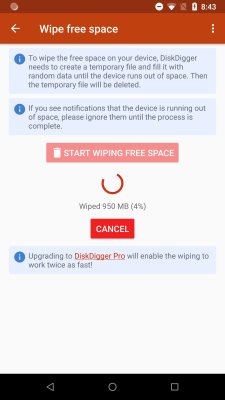
A while ago I introduced a feature into DiskDigger which wipes the free space on your Android device. This is useful for ensuring that no further data could be recovered from the device, even using tools like DiskDigger.

However, some users have been reporting that the wipe feature doesn’t seem to be working properly: certain bits of data still seem to be recoverable even after wiping free space. This is partially my fault for not sufficiently clarifying how to use the feature most effectively, and partially Android’s fault for making its storage and security system exceedingly complex.

Let me clarify a few things about how this feature works, and emphasize some precautions you should take before proceeding with the wiping.

  • In order for the wipe to work correctly, the files that you need to get wiped must be deleted from the filesystem. The wipe can only cover the free (unallocated) space on the device’s storage. If the files still “exist” in the filesystem, they will not be wiped.
  • In addition to deleting files you would like to be wiped, recall that many apps maintain a local cache of data that the app deems necessary to store. This could include things like thumbnails of photos (or even full-resolution copies of photos), draft copies of documents, logs of conversations and activity, etc. To delete all of these things, you would need to go to Settings -> Apps, and for each app, go into “Storage” and tap “Clear cache.”
  • Even worse, some apps break the rules and store data outside of their designated cache folder. Therefore you may even need to tap the “Clear storage” button for each app, instead of just “Clear cache,” or even use a file-manager app to navigate your device’s internal storage and manually delete unwanted files, and only afterwards go back to DiskDigger and wipe free space.

Of course the best way to make sure the data on your device is no longer recoverable is to perform a factory reset of the device, and then use DiskDigger to wipe the free space. But even then, certain portions of the data could be recoverable, depending on the manufacturer’s definition of “factory reset,” or how the given version of Android handles resetting.

All of this is to say, there is unfortunately no single guaranteed fool-proof way to permanently wipe your Android device, but DiskDigger’s “Wipe free space” function goes a long way if used properly.

NTFS compression minutiae

It’s been a rather productive sprint of making enhancements to DiskDigger in recent weeks, specifically in solidifying its support for parsing NTFS filesystems, and supporting the finer details and edge cases that are found in the wild.

Firstly, individual files in NTFS can be compressed, which the user can choose to do to conserve disk space. This is done by taking the file data and compressing it using a variant of LZ77. (DiskDigger has been able to recover compressed files, but I have now improved the speed of the decompression routine.)

However, there is a second way that files in NTFS can be compressed. Starting with Windows 10, there is a system process that runs in the background and looks for system files and program files that are seldom used, and compresses them in a different way: it creates an alternate data stream called WofCompressedData and writes the compressed data to it, using either the Xpress or LZX algorithms (Xpress seems to be the default). The original data stream is turned into a sparse stream, and the file gets a reparse point added to it. This is a bit confusing because these types of files are not shown as “compressed” files in Windows Explorer, and yet they are compressed at the level of the filesystem. You can see which files are compressed this way by running the compact command at the command line.

Anyway, DiskDigger now supports this second type of compression in NTFS filesystems, and will transparently decompress the file when it’s recovered. Of course this also means that these types of files can only be recovered at the filesystem level (“Dig Deep” mode) and cannot be carved heuristically (in “Dig Deeper” mode).

As a side note, various different types of compression are available via Windows APIs or the .NET framework itself:

  • .NET offers the System.IO.Compression namespace which has DeflateStream and GZipStream, which implement the DEFLATE algorithm (using zlib under the hood), and also ZipArchive for dealing with actual Zip files. Many file formats use DEFLATE compression, but it doesn’t help us for compressed NTFS files.
  • Windows itself provides the little-known Compression API (via cabinet.dll) which lets us use the Xpress, LZMS, and MSZIP algorithms. This API can be easily P/Invoked from .NET, but unfortunately this means it can’t be used outside of Windows. This API fulfills half of the requirements for decompressing WofCompressedData streams, which use Xpress compression by default.

However, the above APIs are the extent of what’s offered to us by the system, which means that algorithms like LZ77 and LZX must be implemented manually, or using other third-party libraries. I opted for the former in DiskDigger, to keep my number of dependencies to a minimum.

Euler walks

This is the first 10000 digits of e (the base of the natural logarithm), as interpreted by a spiral walk determined by each successive digit:

Zoom:

And here is a similar interpretation for γ (the Euler-Mascheroni constant):

Zoom:

Pi walk

This is the first 10000 digits of π, as interpreted by a spiral walk, with each step of the walk determined by each digit. In other words, if the first digits are “3.1415…” then we walk up 3 pixels, then left 1 pixel, then down 4 pixels, then right 1 pixel, then up 5 pixels, and so on, while painting each step of the walk with a different random color.

Zoom:

Ulam’s spiral in your browser

My day-to-day work is focused mostly on Android and Windows development, so I often find myself a bit disconnected from web development. I thought I’d go through a few random exercises in JavaScript, and simultaneously bring some of my oldie-but-goodie projects “up to date,” as it were. A long time ago I made a Windows application that displays the Ulam prime number spiral, but there’s no reason it can’t be done in the browser today, so here we go:

Zoom:
Highlight twin primes
Highlight Mersenne primes

The above picture is dynamically generated in your browser. Go ahead and interact with it: you can use your mouse scroll wheel to zoom in and out, and use the checkboxes to highlight certain special types of primes.